
Bot settings
Location:
☞ 🔐Admin | ⚙️Bot SettingsThe settings section contains both independent settings that are available initially, and settings for individual functions connected in the form of add-ons. Therefore, the contents of this menu can change with activation of the new functionality. The main feature of the settings collected here, is that they all work at the level of the bot itself and affect its work as a whole - by determining how your bot looks and reacts to commands, yours and your users.
The number of options and settings may vary depending on the number of connected "🧩 Extensions".
❖ Section Contents - Bot Settings
To go to the settings, go to your bot:
☞ 🔐Admin | ⚙️Bot Settings

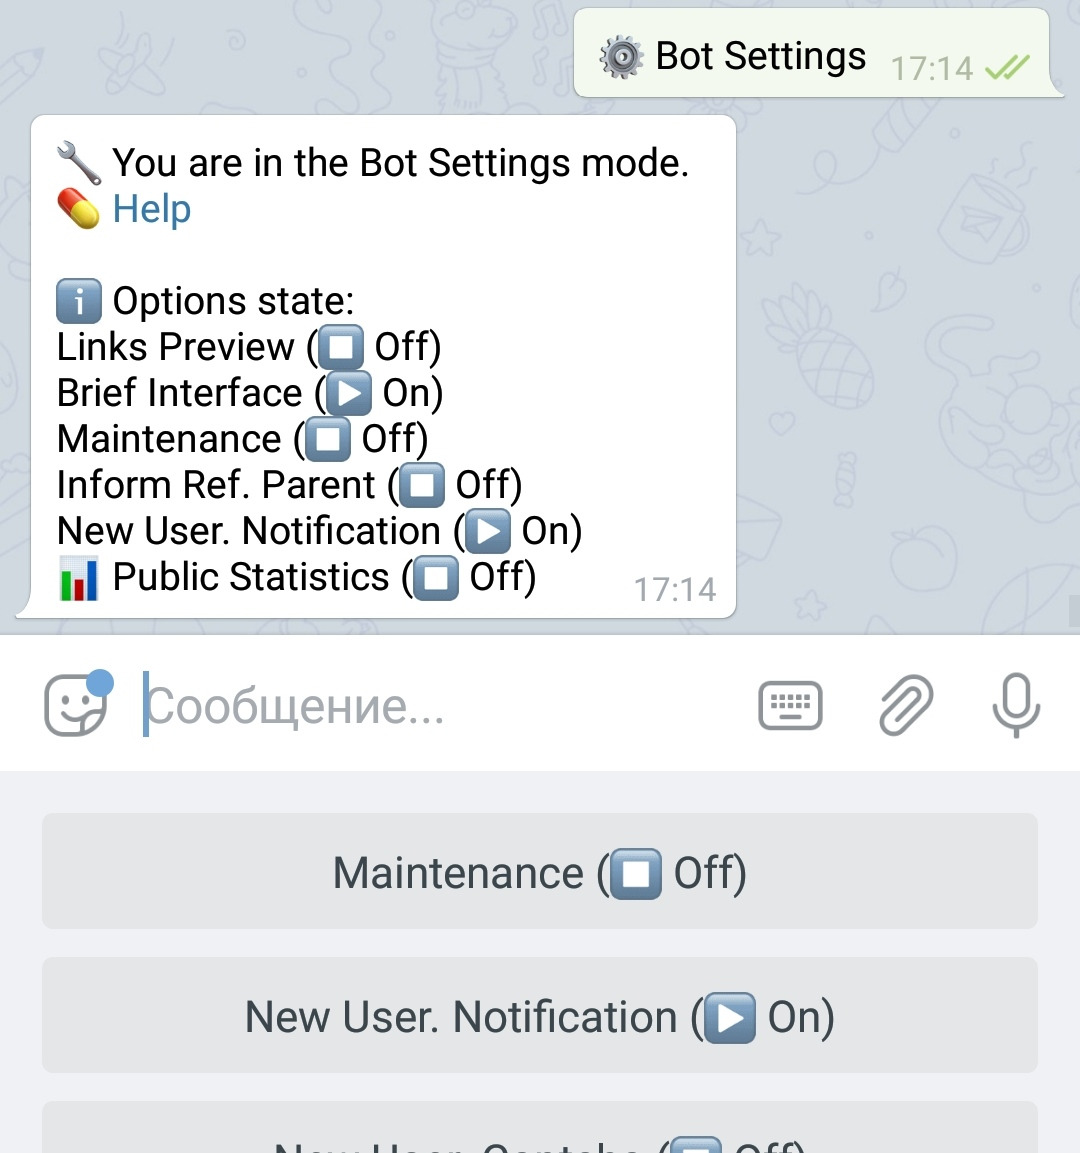
All settings are switched by pressing the buttons.
The setting status is displayed on the button itself and in the message of the Settings section.
• • •
Below is a description of the available settings.
Maintenance (mode)
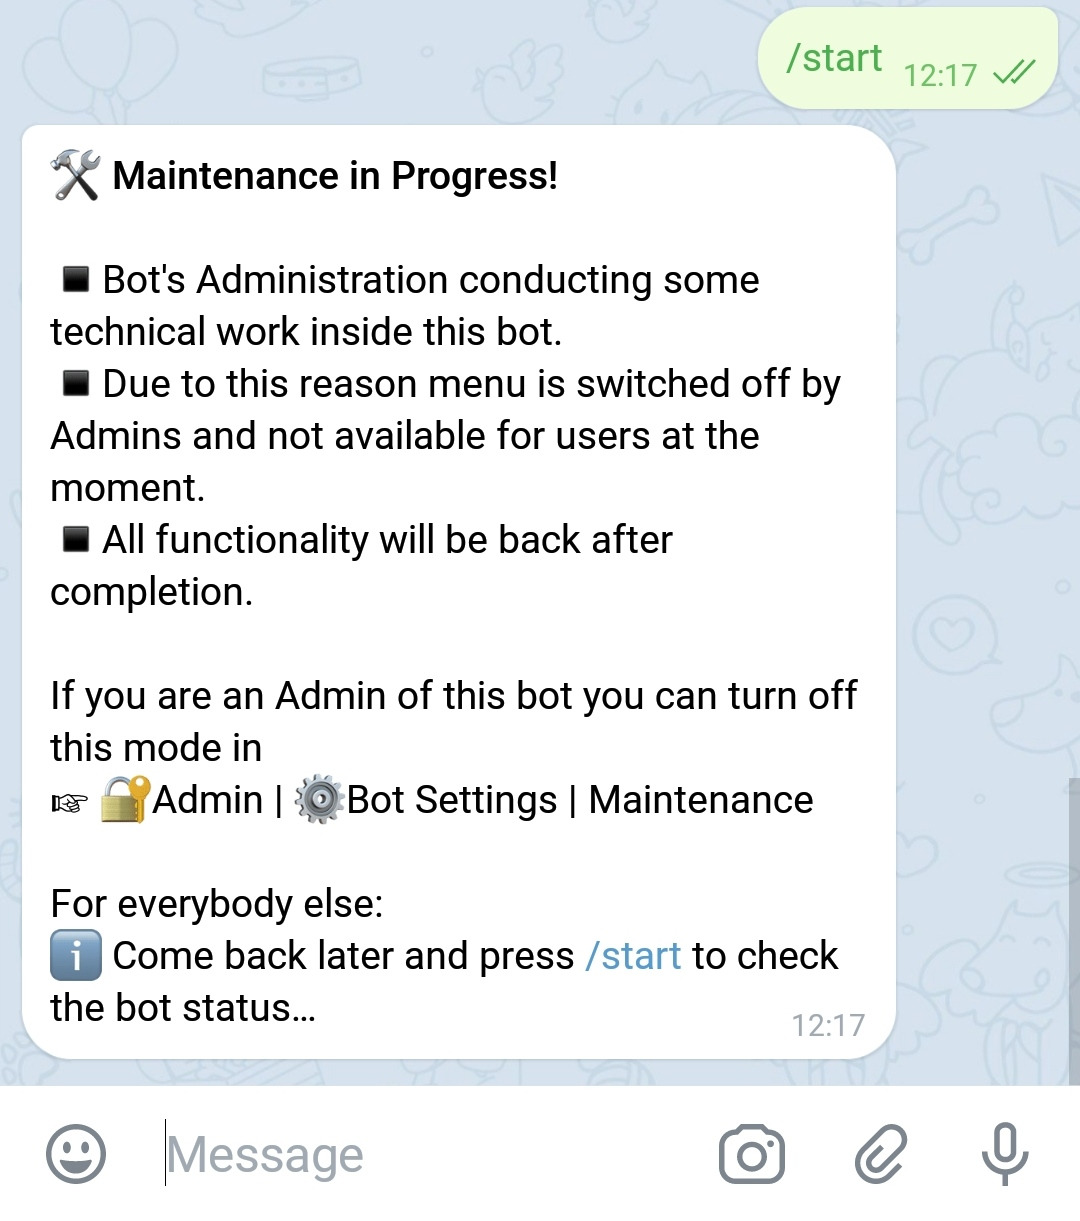
Closes access to the bot for everyone except admins, showing a message about the enabled Maintenance Mode.
Modes:Off ⏹️ - the function is disabled.On ▶️ - the function is enabled.
After activation, the entire bot switches to the "Admin Only" mode, making its functionality inaccessible to the average user. Admins see everything as usual. They can edit the menu, navigate through it in view mode, etc. For users, for any of their actions, a following "stub" will be shown:
IMPORTANT: New users (and referrals) who come to the bot during active maintenance mode will BECOME bot users and, accordingly, will BE counted as referrals.
For more information on how an account becomes a User in a bot, and in what sequence the bot's protection functions are executed, see the Glossary for the word User.
IMPORTANT: If your bot suddenly starts showing a "stub" message, then you accidentally switched this setting.
The service mode "stub" message can be customized - changed to your own.
Custom messages.
To connect, go in your bot:☞ 🔐Admin | 🧩Extensions | 📂Customisation
This mode can be used to make changes to the menu structure or other significant functional changes. To make local changes, use the "Admin only" mode in the button editor.
New user. Notification
Enables notification about every new user in your bot.
Modes:Off ⏹️ - the function is disabled.On ▶️ - the feature is enabled (only consumes renewable Tokens of Messages).On (+Add.) ⏩ - the function is enabled (after the end of renewable, it spends additional Tokens of Messages).
When enabled (in mode On ▶️), the feature consumes renewable «Tokens of Messages». One user - one Token of Message. The deduction occurs after every 100 messages. After renewable tokens are depleted, if the mode is not changed, messages will stop coming. To continue receiving notifications after the end of the renewable tokens, enable the mode On Add ⏩. In this mode, if all renewable tokens are used, the bot gets permission to use additional «Tokens of Messages».
ATTENTION: Functionality uses «Tokens of Messages».
Package of «Tokens of Messages».
To purchase additional Message Tokens, go in your bot:☞ 🔐Admin | 🧩Extensions | 📂Mailing
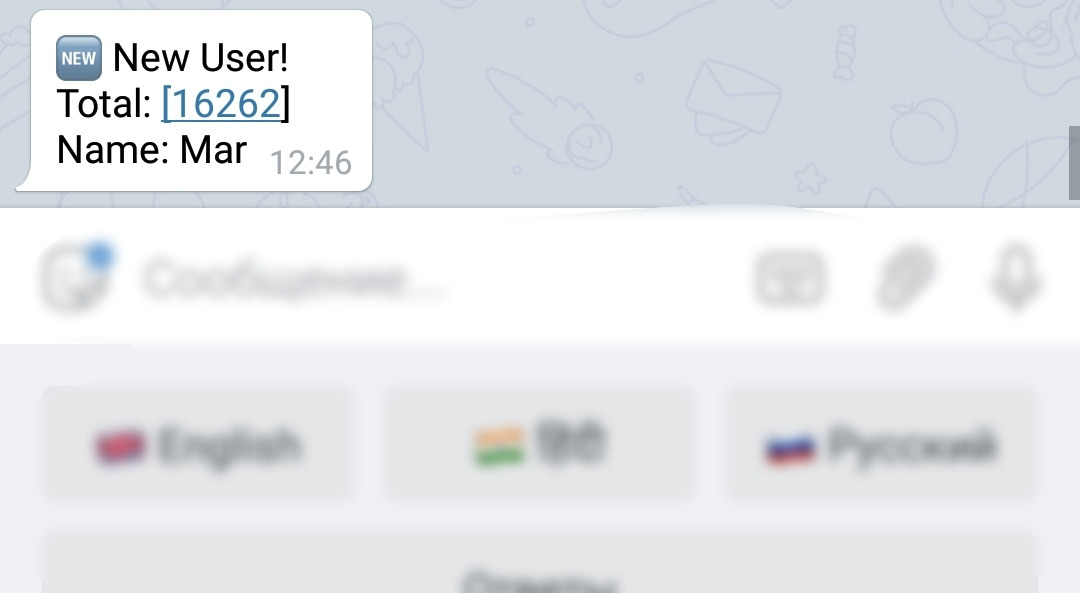
When enabled, the admin will receive a message (in the chat with the bot) something like this:
If a new user came through someone's referral link, then after the words "new user" a note will appear: 🆕 New User! (ref).
The default message, in addition to the text of the notification itself, will contain:
• the total number of users
• the name of the person who came.
• whether the user is someone's referral.
In the future, we may add more options for this message.
The display of the Telegram ID or other account data allowing the unique identification of the incoming user will not be added - NEVER - for ethical reasons.
Sometimes, during intensive new users influx, the data of their total number in message may not change, repeating same several times in a row. Despite this, in the main statistics, the total number of people arriving is counted correctly, and after the decrease in intensity, the numbers in the notifications will come back to normal.
Captcha
New user. Captcha
Allows you to enable user verification using captcha, thereby protecting the bot entirely from automated robots activity.
Modes:Off ⏹️ - the function is disabled.Ref 🆕 - the function is enabled only for those who came via the referral link.All 🆕 - the function is enabled for everyone.
If, the captcha was enabled for a particular case, no one will be considered a bot user until the captcha is resolved.
No one will receive any payments, bonuses or any other types of profit, neither the user himself nor his referral parent - until the captcha is solved by the new user, regardless of whether he came from the referral link or not, if the captcha is enabled for his case.
For the current list of Captcha types and their features, see the Extensions or the Captcha Guide.
Basic (paid) captcha.
To connect paid captcha, go in your bot:☞ 🔐Admin | 🧩Extensions | 📂Protection
Notify ref. parent
Enables or disables notification of the referral parent if a new user comes via his referral link.
Modes:Off ⏹️ - the function is disabled.On ▶️ - the function is enabled.
The message for "Ref. Parent" can be customized - changed to your own.
Custom messages.
To connect, go in your bot:☞ 🔐Admin | 🧩Extensions | 📂Customization
Brief interface
The setting is intended to create a more compact interface. Makes changes to the editors of buttons and posts.
Modes:Off ⏹️ - the function is disabled.On ▶️ - the function is enabled.
It was created for administrators who are well acquainted with the interface and functionality of the bot and for that reason do not need button titles (that uselessly occupy screen space), to managing the bot.
The regular interface buttons look like this:

The brief interface buttons look like this:
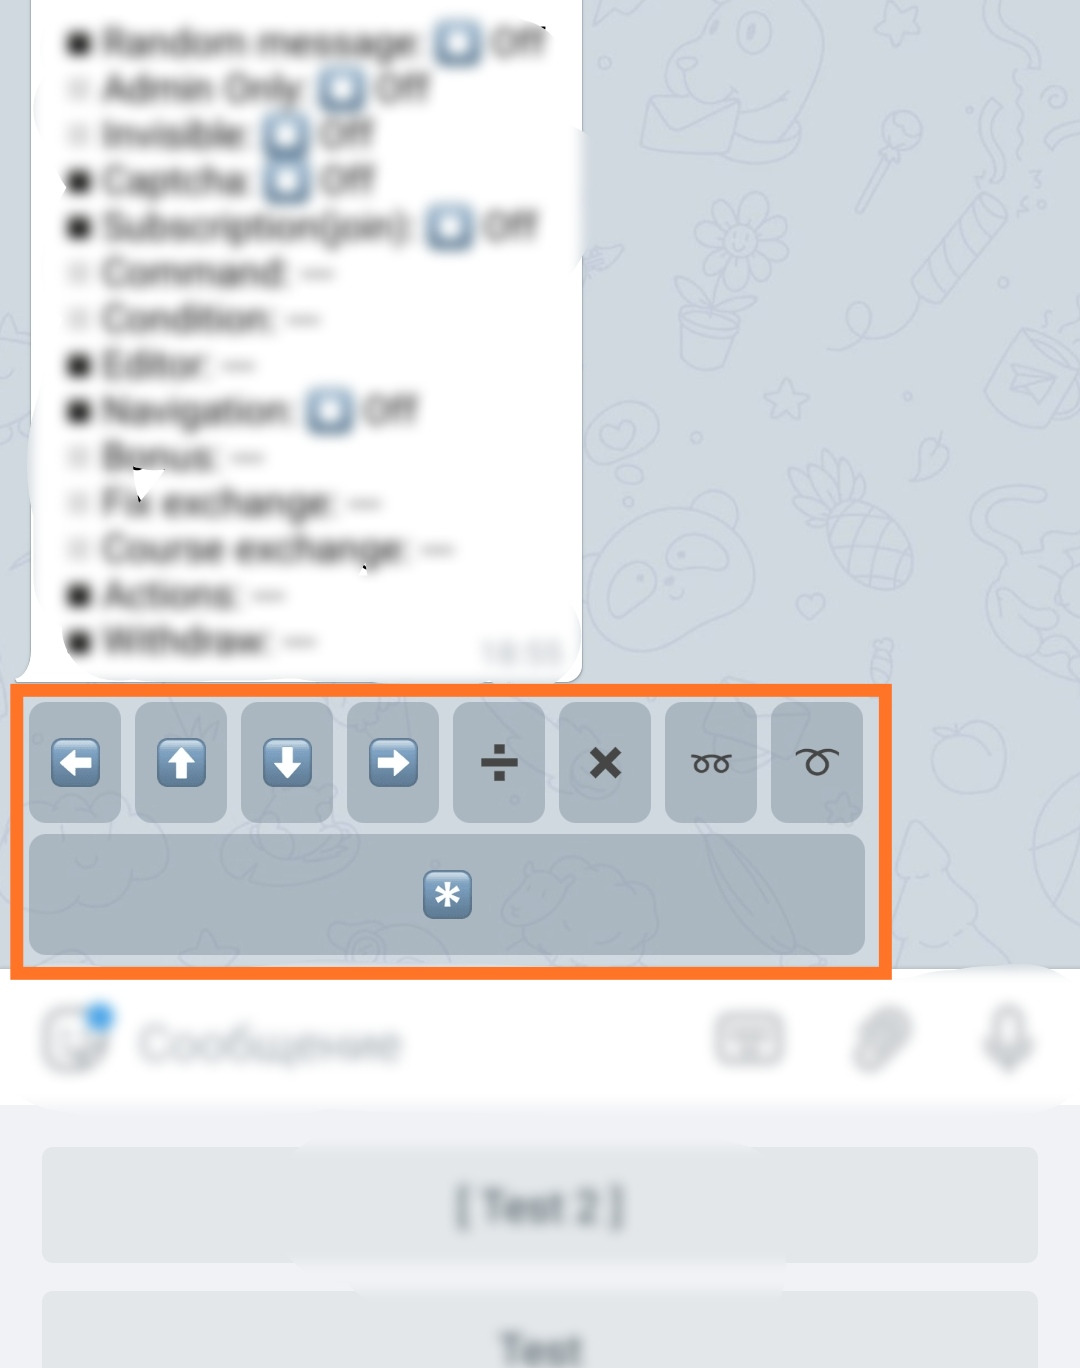
Of course, you can switch between modes at any time.
Delete Inline
Once enabled, automatically deletes the inline menu and its message (or two), after the inline button (in command mode) belonging to them was pressed.
Modes:Off ⏹️ - the function is disabled.1⃣ - the function is enabled - one message will be deleted.2⃣ - the function is enabled - two messages will be deleted.
The bot constructor @MenuBuilderbot allows you to add inline buttons creating full-fledged inline menus under you messages. At the time of this manual being created there were 3 types of inline buttons available: Url/Share, Pop-up window, Command. First two types of buttons once pressed are not causing appearance of any additional messages in a bot's chat, while inline buttons with commands, in a most case scenario, will contain messages appearance of which in a bot's chat inevitably causes the "slide" of inline menu - making it irrelevant, useless, or simply inconvenient to use. In order not to confuse the user with irrelevant buttons scattered in the chat's body, this function was made. It allows you to automatically delete old menus, avoiding unwanted clicks. Manual on How to manage inline buttons.
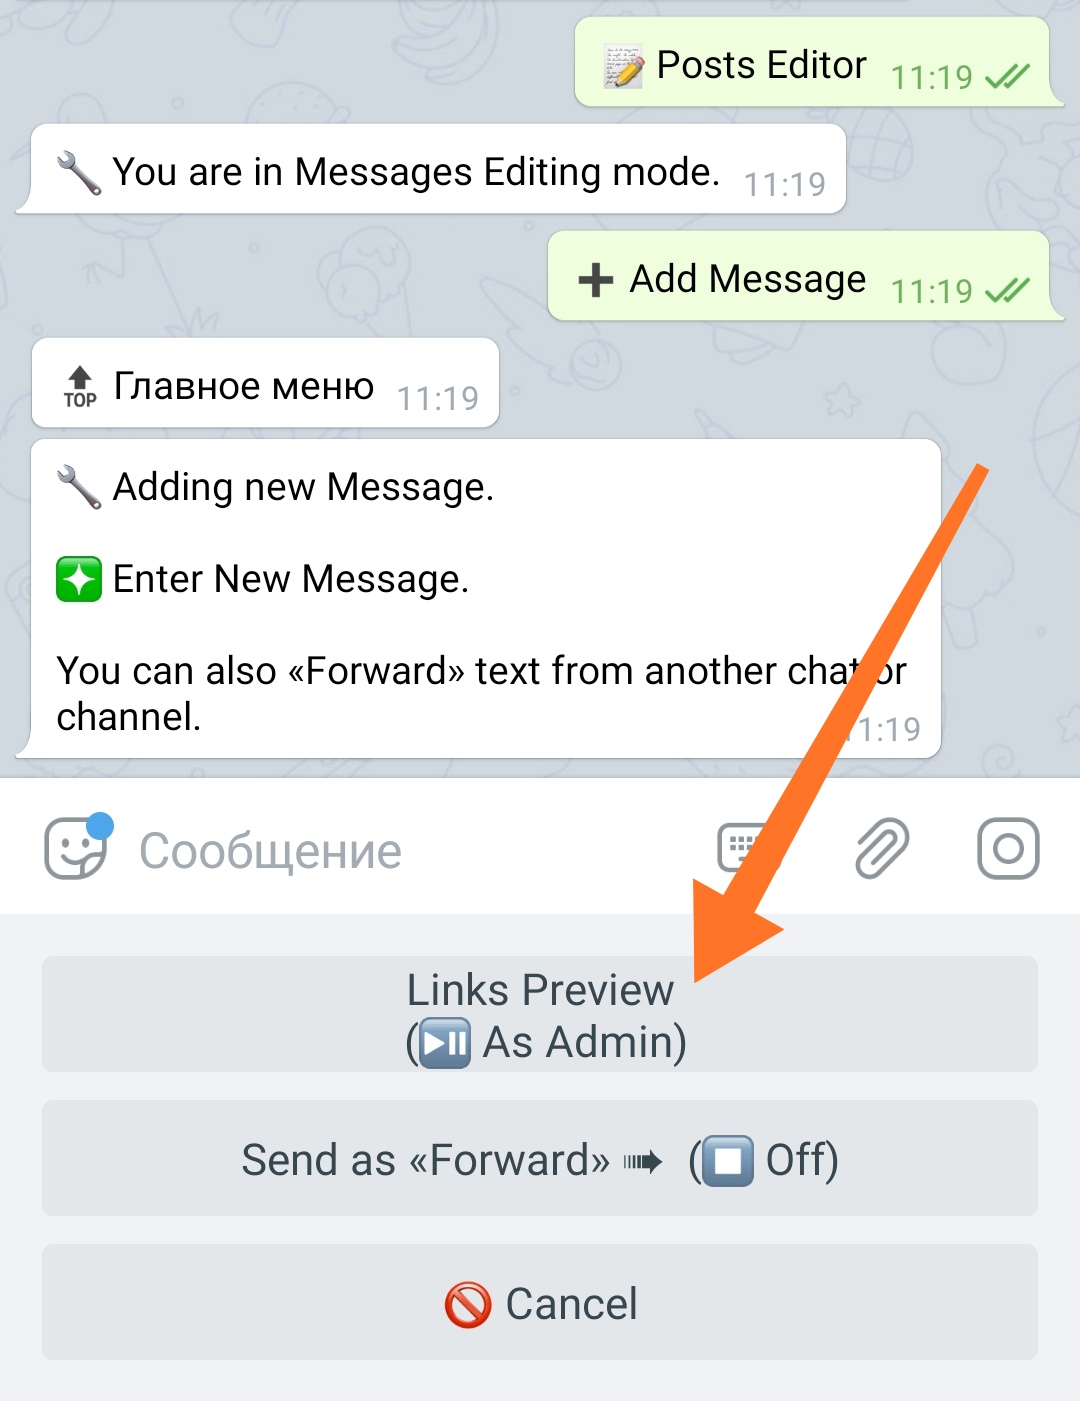
Links preview
Setting determines the state and at the same time letting you switch Links Preview for all posts in bot created in «As Admin» mode.
Modes:Off ⏹️ - «As Admin» mode is disabled.On ▶️ - «As Admin» mode is enabled.
Manual on How to manage links preview and its modes.
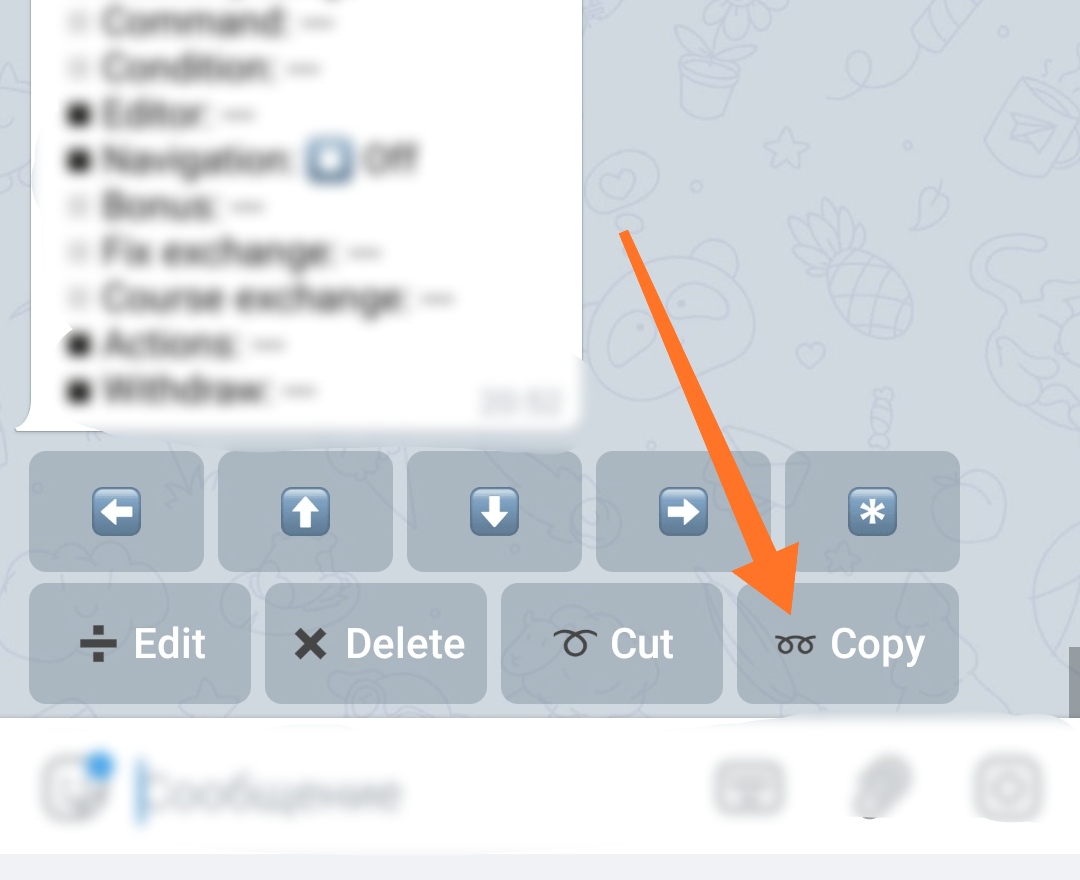
"Copy" button
Allows you to enable the function of copying buttons, posts (messages) and their functionality in the bot.
Modes:Off ⏹️ - the function is disabled.On ▶️ - the function is enabled.
ATTENTION: the function consumes 100 "Additional Tokens of Functions" for 1 copied entity - a button or a message. Tokens must be purchased before function can be activated.
When activated, adds a copy button to the Buttons Editor and Post Editor. The function allows you to copy a button you created earlier with all the functionality added to it, sub-menu's buttons and messages. If the copied button contains paid functions, the required number must be purchased in your bot in advance. When copying a message, the entire content of the Post is copied - media, text with formatting, inline buttons and message settings.
Balance in the Main Menu
The contents of the Balance button will still be available using the button's name, even if the button itself is hidden.
Shop in the Main Menu
After activation the «Shop» button is still available in Admin.
Admin Reply with no Signature
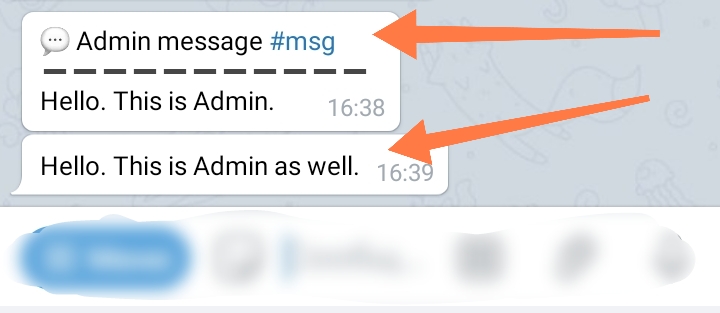
Allows you to hide the signature "💬 Admin message #msg" when the admin responds in the bot.
Modes: On ▶️- The signature is hidden. Off ⏹️ - Signature is shown (default).
Always Show Lower Menu
Allows you to force the bot's lower menu to remain open in cases where this is possible. Removes the "hide bot menu" button in the interface.
Modes:On ▶️ - The bottom menu will be fixed.Off ⏹️ - The bottom menu is hidden whenever possible (by default).
New Users
The setting determines how the bot processes NEW users. The check occurs when the new user presses START. Depending on the mode, the user will receive a message with an explanation.
Modes:All - All users can join without restrictions (default) (no user message).Only by Ref. Link - A new user can get into the bot only by Ref. Link (system or custom user message).Not Allowed - New users cannot join the bot (only system user message).
For the mode «Only by Ref. Link» you can set your custom message; for this you need to connect the extension:
«32. Ref. system customization»
To add feature go to your bot:☞ 🔐Admin | 🧩Extensions | 📂Customization
Restrict New Users with no Username
NEW users without a Username in their Telegram profile will not be able to join the bot (does not affect those who are already a user of the bot). The setting allows you to set a message for such users with a request to set a Username for their profile.
If the message is set, the setting is enabled.
Timezone
Here you can configure the time zone of your bot.
Now only affects the operation of macros: %date% and %time%.
The setting allows you to display the time of your region to users.
The Time Zone is one number from -12.00 to 14.00.
Minutes (if applicable) should be separated by "." (dot).
If you know your time zone in GMT (Greenwich Mean Time) you can use it for UTC (Coordinated Universal Time) - in this case, it's the same thing.
Examples:
To set UTC -08:00 send the bot -8 (or -8.00)
To set UTC +3 send the bot 3 (or 3.00)
To set UTC +3:30 send the bot 3.30