Send now
The "Send Now" mailing option is designed to send messages immediately after its creation. After the end of the distribution, it is deleted.
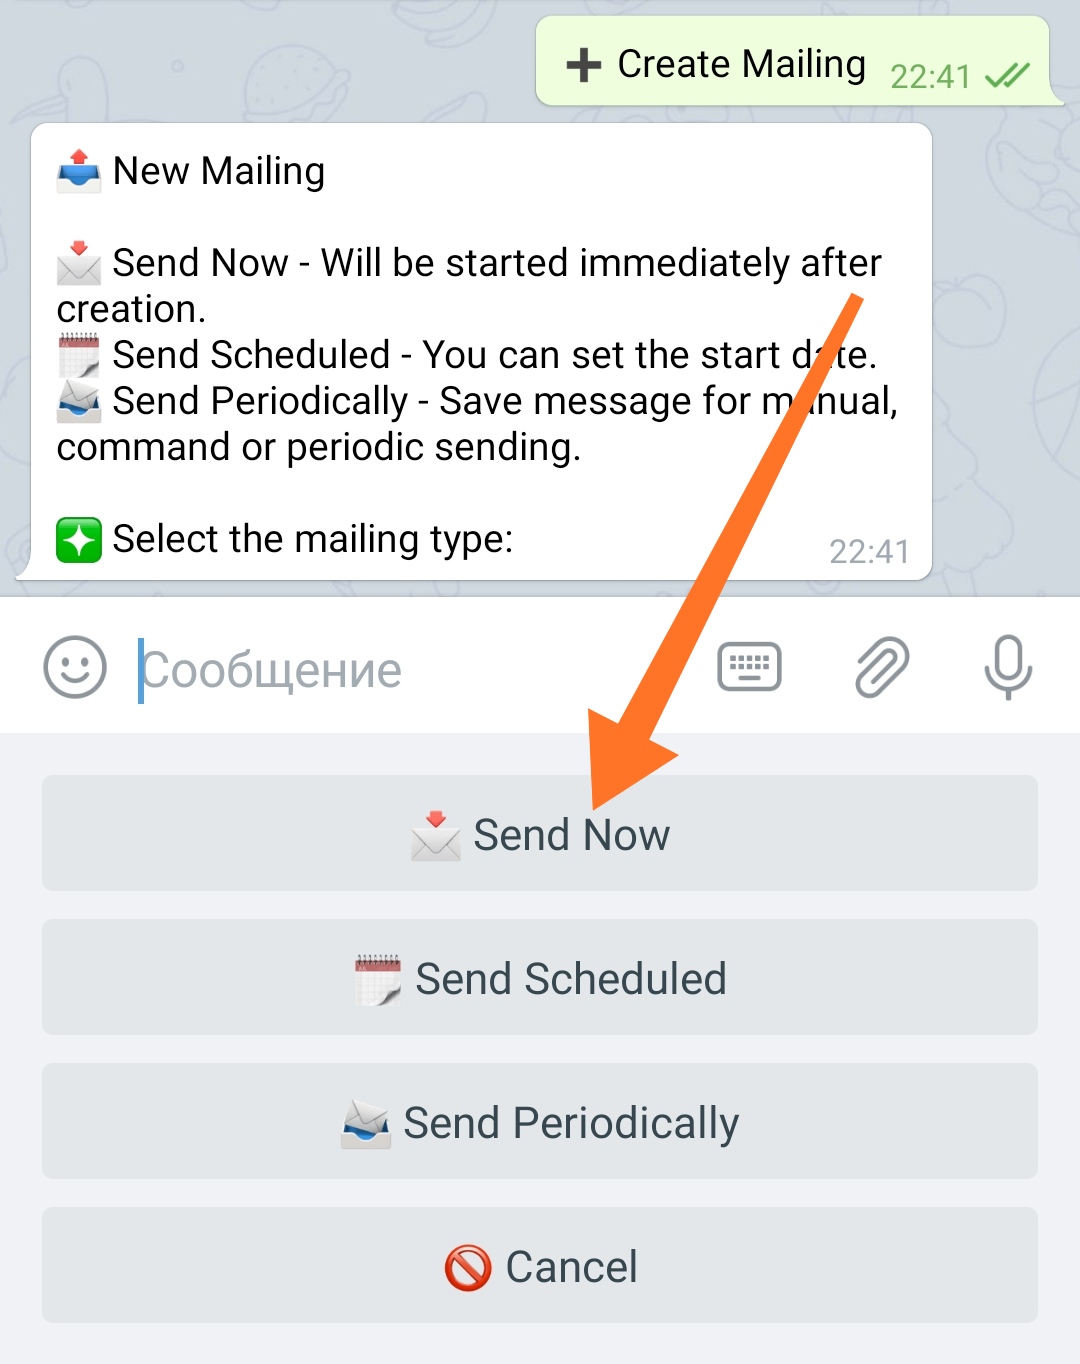
❖ Creation of "Now" mailing
The creation of mailing is done by using a step-by-step Wizard and consists of preparing a message (or messages) and setting up the mailing itself. The number of steps and the availability of individual options in the settings may depend on the active mailing extensions in your bot.
To create a mailing, go to: ☞ 🔐Admin | 📤Mailing | ➕Create Mailing
Step 1 - Press «Send Now»
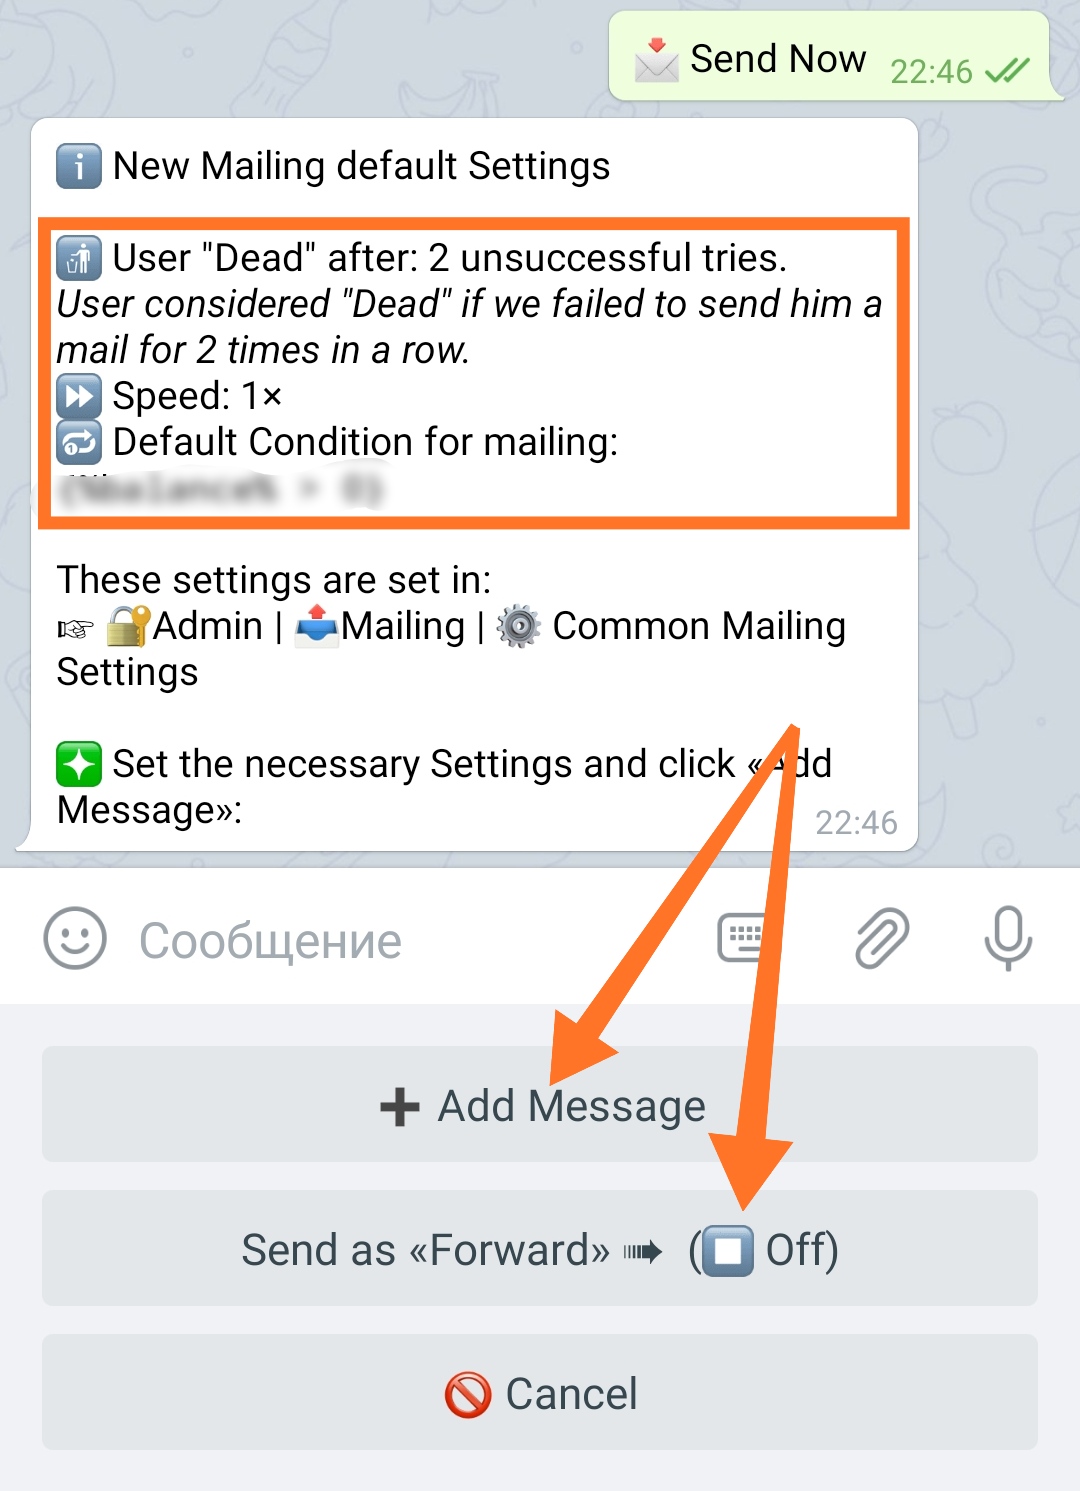
Step 2 - Message sending preparation
An informational message contains default settings data that will be set for the message you create. These settings can be changed later.
You can either enter a message manually or forward it from a channel or group. When forwarding a message from a channel or group, set the «Send as Forward» setting to «On» (Enabled) if you want to keep a link to the source.
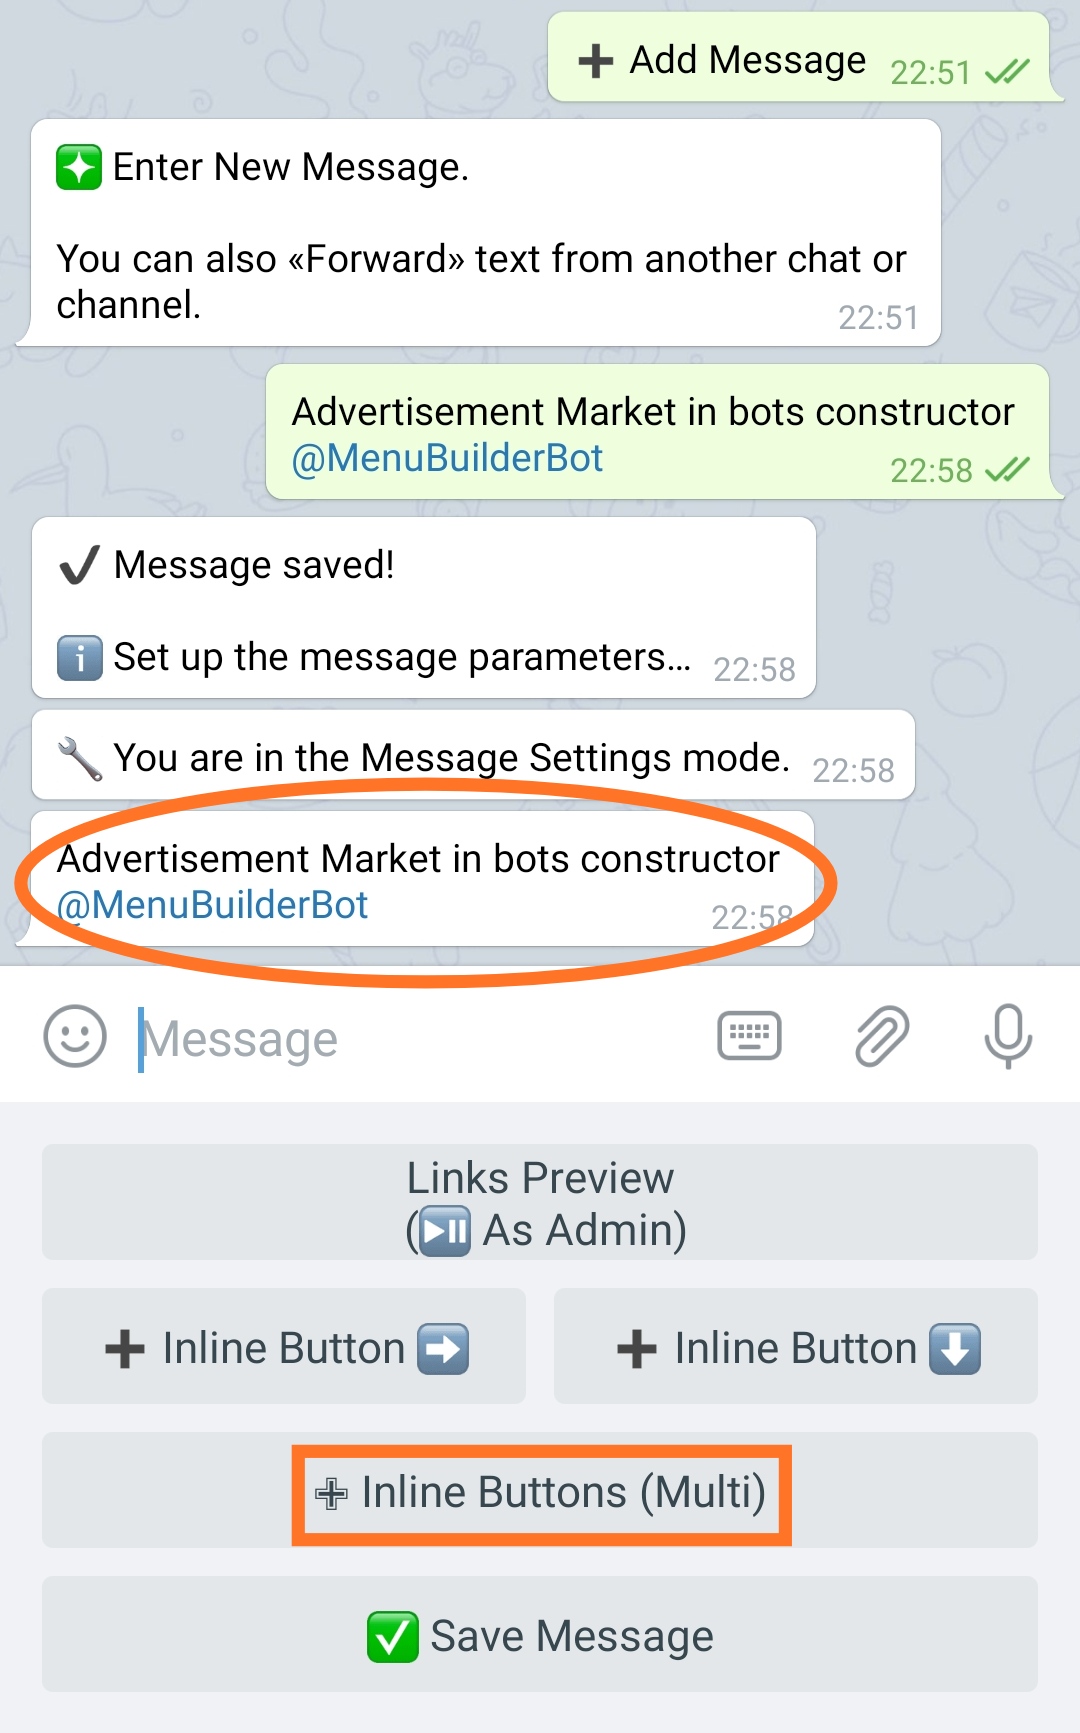
Then press «Add Message».
IMPORTANT: WHEN ADDING A MESSAGE, keep in mind - in Telegram, one "Message" is either a PICTURE WITH A DESCRIPTION, or TEXT, or FILE. An Album of several pictures (or files) is SEVERAL MESSAGES. Do not try to send an Album of pictures as one message - you will get an "Unknown Command" error.
Obviously that if you have the «Mailing of Multiple Messages» extension activated, then the album you sent MAY not show an error, but each picture will be created as a SEPARATE message. One way or another, you will not get the result you expect.
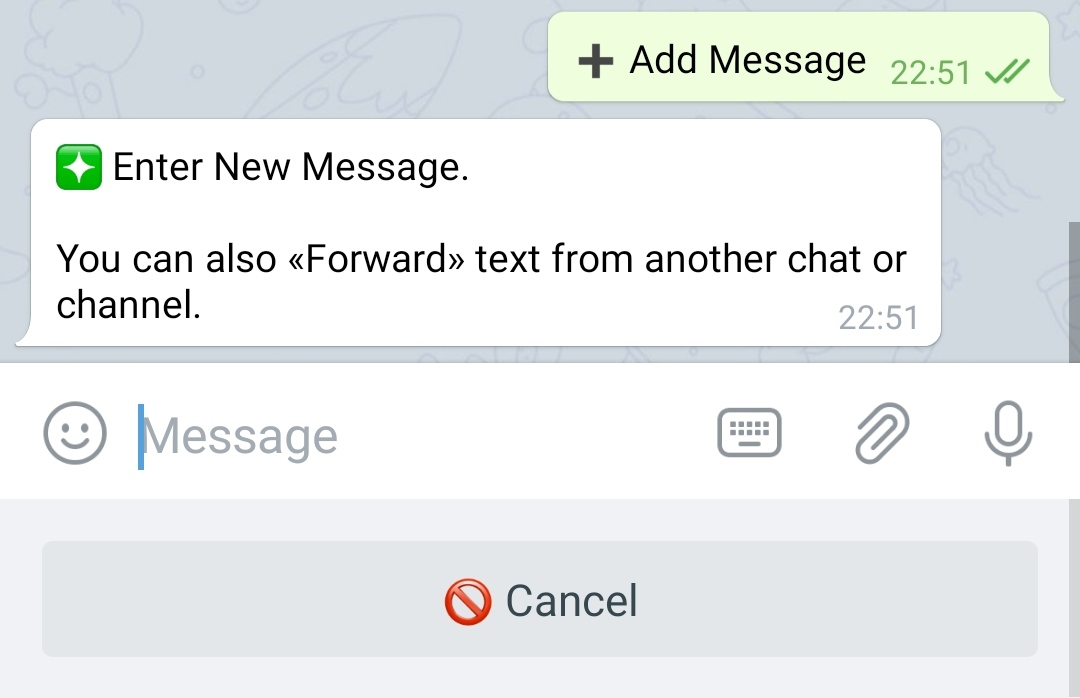
Step 3 - Sending a message
Enter and send to the bot or forward the desired message.
Step 4 - Message Settings
At this step, you can turn on the "Link Preview" option for the message you creating, as well as add "Inline Buttons" - read about how to do this in the relevant guides by links in the text.
The presence in the interface of the button named «Inline Buttons (Multi)» will depend on whether the corresponding extension is active:
Advanced Modes for Adding Buttons.
To connect, go to your bot: ☞ 🔐Admin | 🧩Extensions | 📂Optimization
The extension allows you to add several inline buttons at once.
Press «Save Message» after completing all the necessary settings.
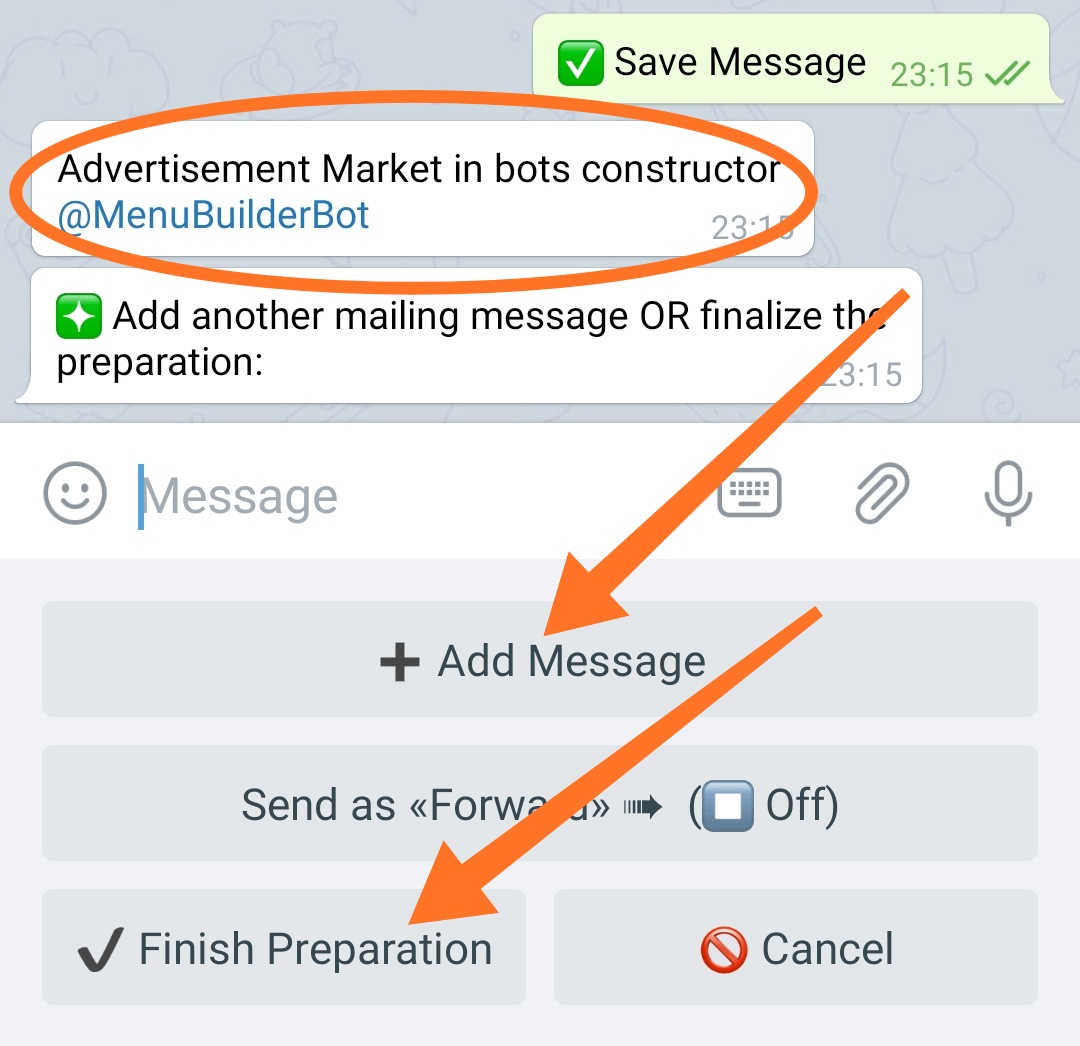
Step 5 - Adding a Second or More Posts
Here you will be given the opportunity to add another message for simultaneous mailing.
The presence of this step in the interface will depend on whether the corresponding extension is active:
Mailing of Multiple Messages.
To connect, go to your bot: ☞ 🔐Admin | 🧩Extensions | 📂Mailing
The extension allows you to send several messages at the same time in one mailing.
To add another message, repeat the steps from Step 2 of this guide.
After adding all the necessary messages, click «Finish Preparation» to proceed to the next step.
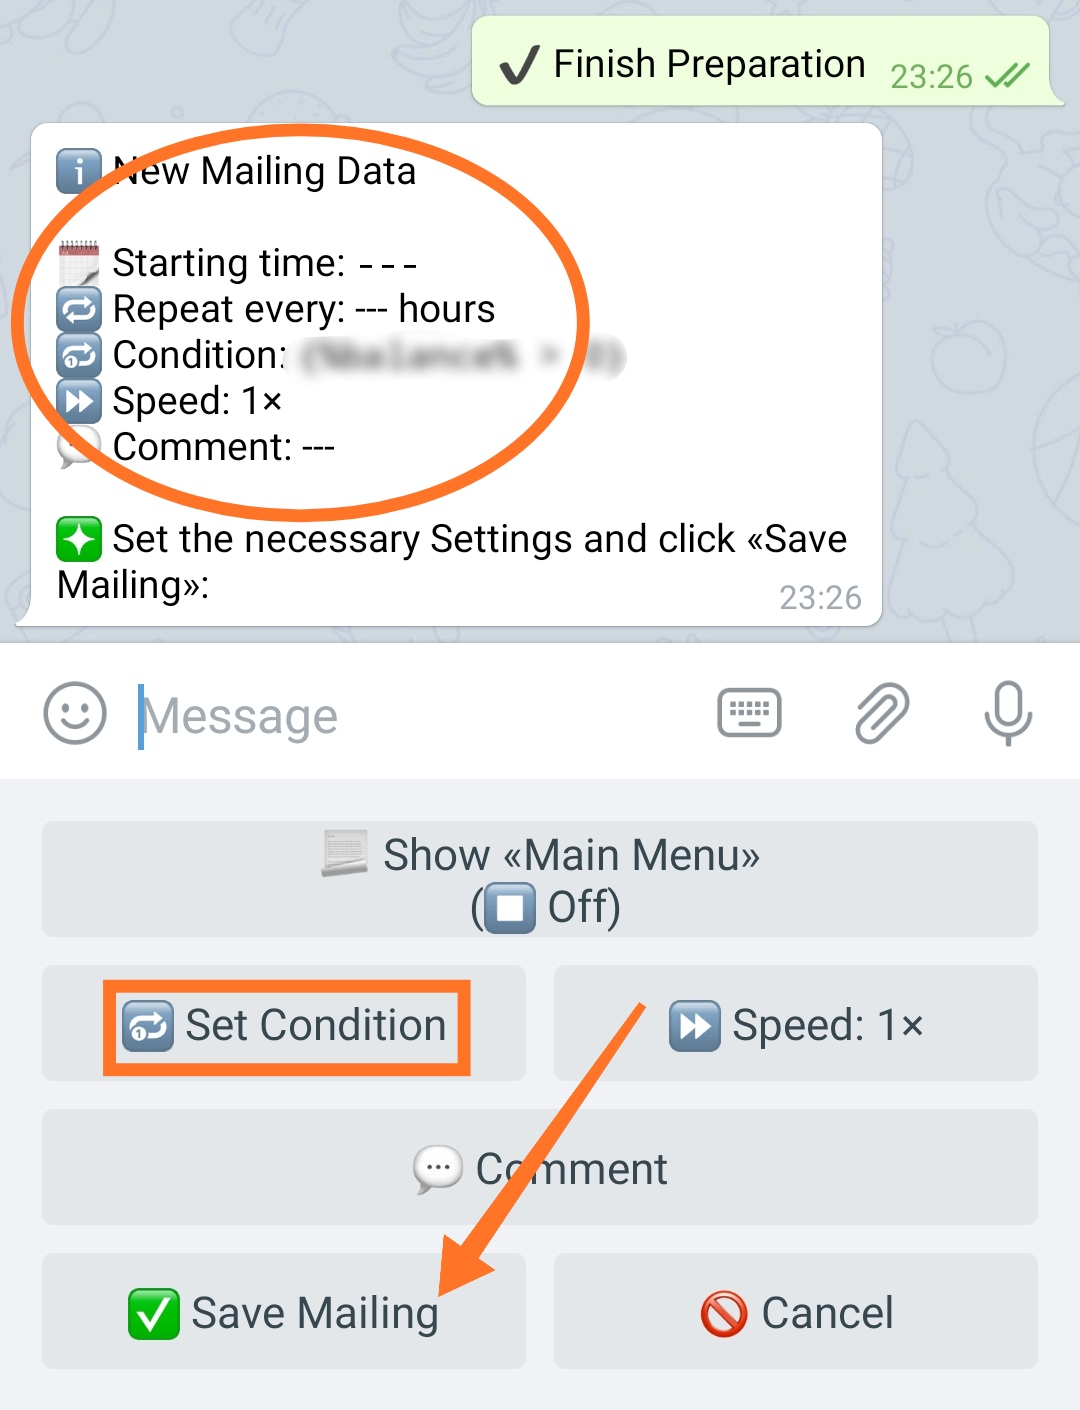
Step 6 - Mailing Setup
The informational message contains the current mailing settings.
Show «Main Menu»
If enabled, the bot's Main Menu will be shown to the user when a mailing message is received. Basically, the function is needed when making changes to the bot's menu in order to update it for all users.
Modes:Off ⏹️ - the function is disabled.On ▶️ - the function is enabled.
IMPORTANT: when this option is enabled, inline buttons of the message (if any) will not be shown. This is due to the mechanics of the Telegram itself. The buttons of any - the inline or lower menus are attached to the message. Only one menu can be attached to a message at a time - either inline or lower. Therefore, when sending a single message and needing to show the Main Menu, the inline menu cannot be shown at the same time. This mechanic has nothing to do with the constructor - this is how Telegram itself works.
Set condition
The presence of this step in the interface will depend on whether the corresponding extension is active:
Mailing Conditions.
To connect, go to your bot: ☞ 🔐Admin | 🧩Extensions | 📂Mailing
Allows you to use the Conditions in mailing and send your messages to specific user's groups in accordance with these conditions.
Speed
Allows you to set the sending speed.
Works the same as Speed in Simple Mode.
Comment
Allows you to add a comment to the mailing, making it easier to identify a particular one and its purpose.
This is the only place where you can add a comment to the created mailing - it will not be possible to change it in the future.
Press «Save Mailing» after completing all the necessary settings.
Step 7 - Sending
At this stage, you will be prompted to check all created messages again and cancel mailing if needed.
Press «Send» to start mailing.
In «Send Now» mode, the mailing starts immediately.

❖ Additional Information
Peculiarities of Send Now mailing work
● If at the time of creating the "Now" mailing there is another going mailing in the system (started according to the Schedule or Manually by the administrator), then it will be impossible to create such a mailing.
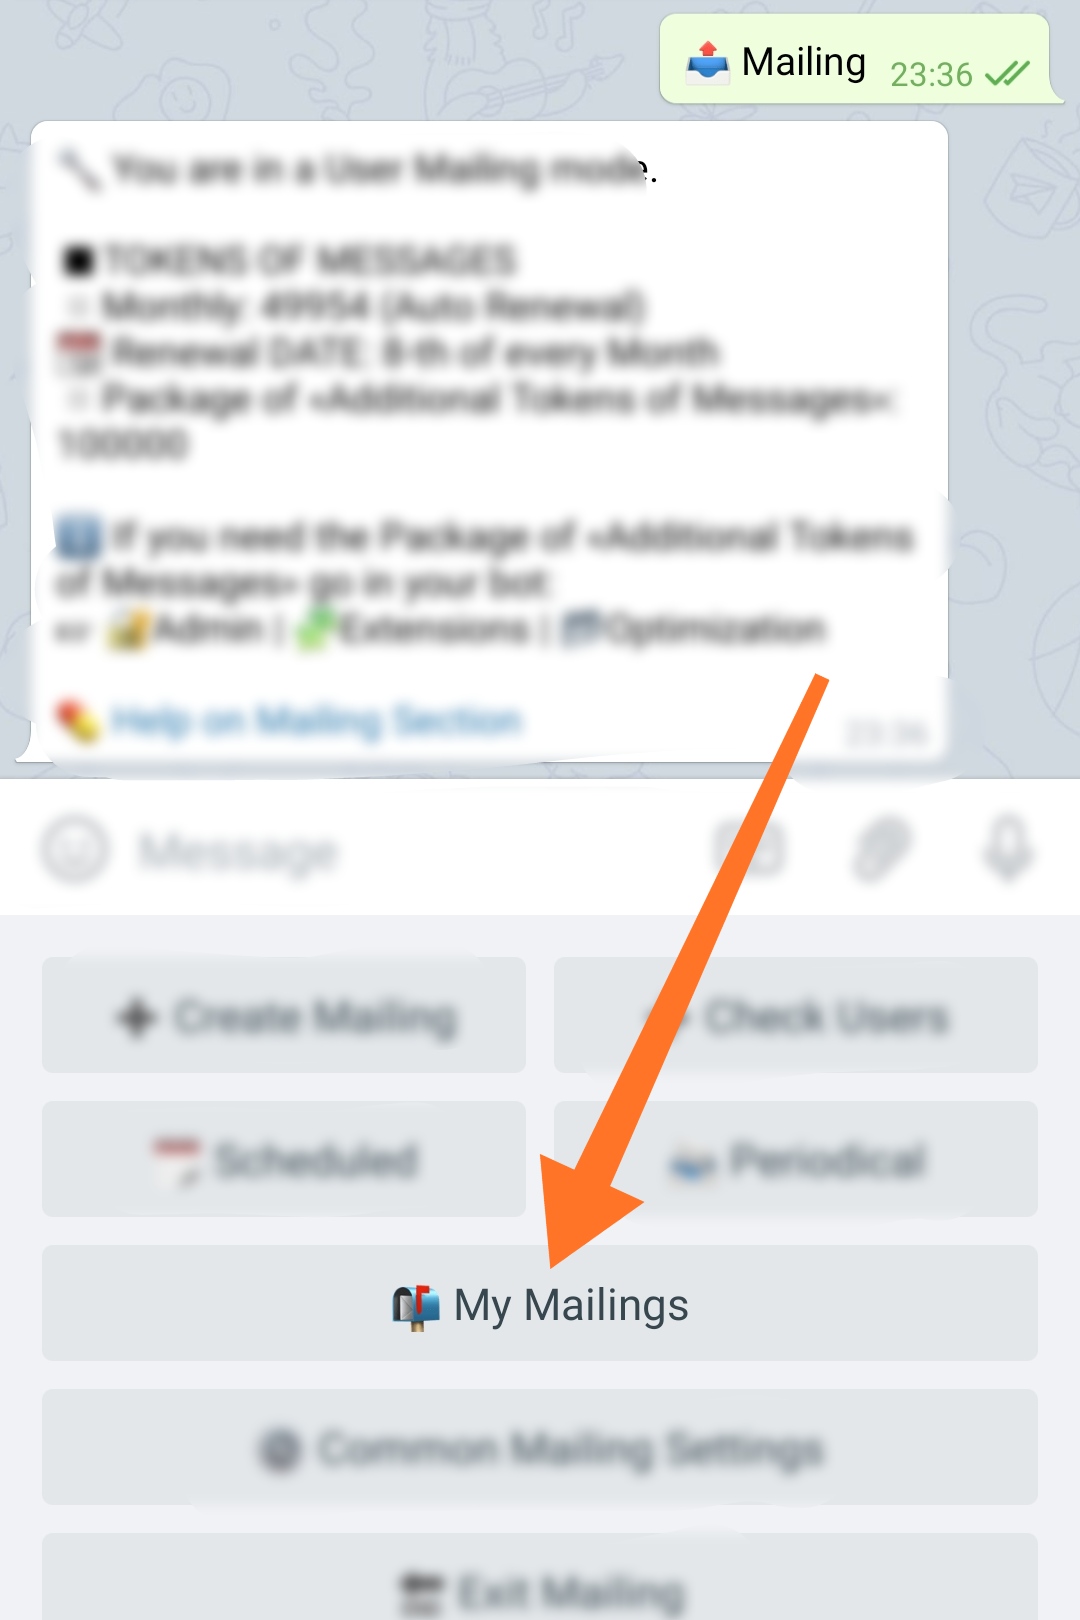
Current mailing status
All ACTIVE - current mailings "Now", postponed "Scheduled", as well as ready to send "Periodical", their statuses - can be seen in the «My Mailings» section.