How to add, setup and delete group
Sequence of actions for the bot to work in a group:
1. Find out the group ID
2. Add a group by ID to the bot.
3. ENABLE GROUP in the bot's settings
4. Make the necessary settings.
5. Add the bot as ADMIN to the group (and grant the necessary rights)
The optimal set of admin rights for a Bot in a group:
• Deleting messages
• User ban
• Pinning messages
A smaller set of rights is possible, but does not guarantee the full functionality.
See below for more detailed instructions...
❖ How to add a group
To carry out its duties, the bot must be added to the group and and BE THE ADMIN IN IT.
If you just add a bot to a group, it will leave it even before you have time to set it as an Admin. In order for the bot to remain in the group, you need to configure it...
1. Go to the group management menu
🔐Admin | 🧫Channels and Groups | My Groups
2. Add a new group
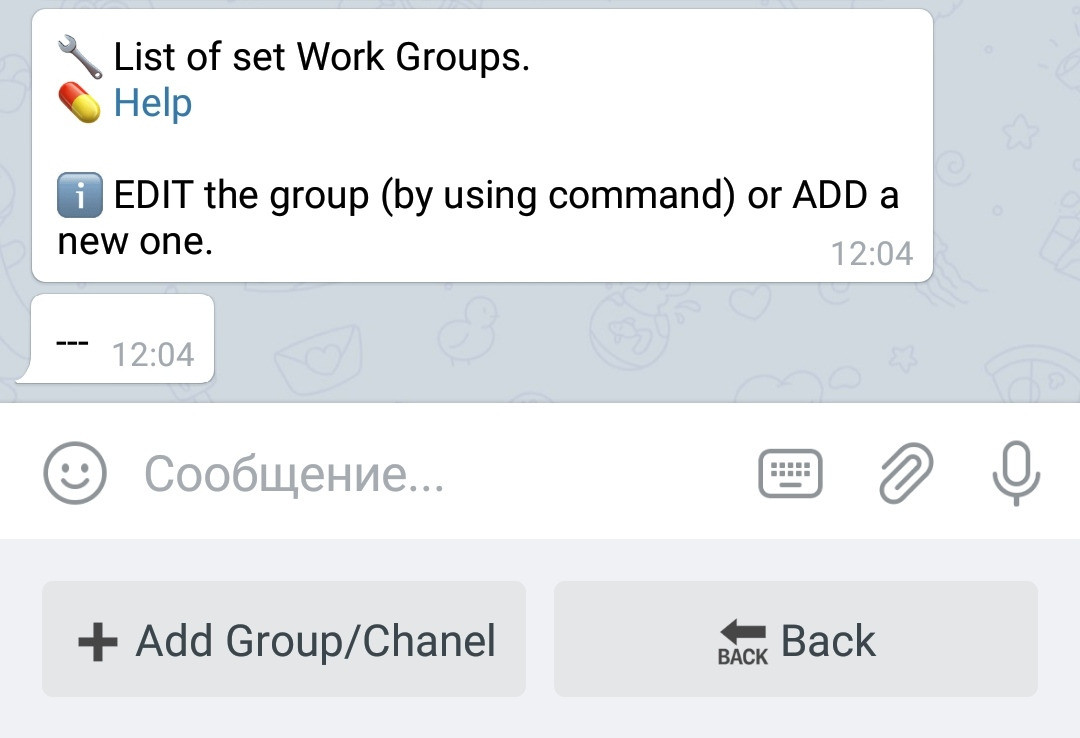
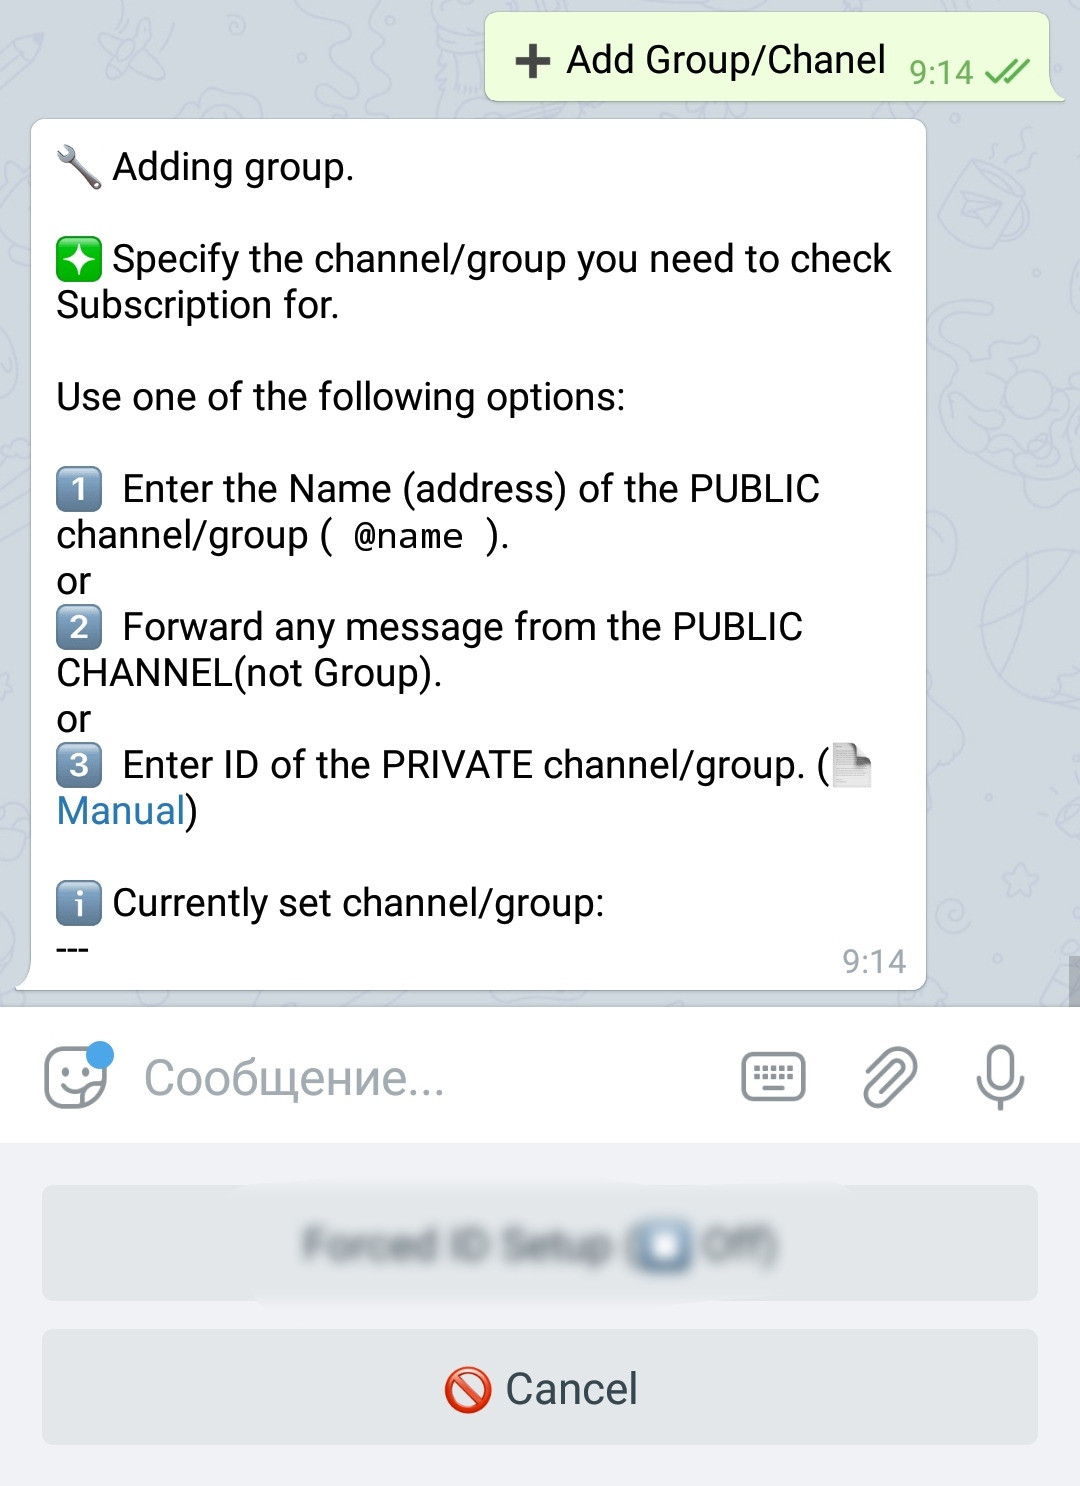
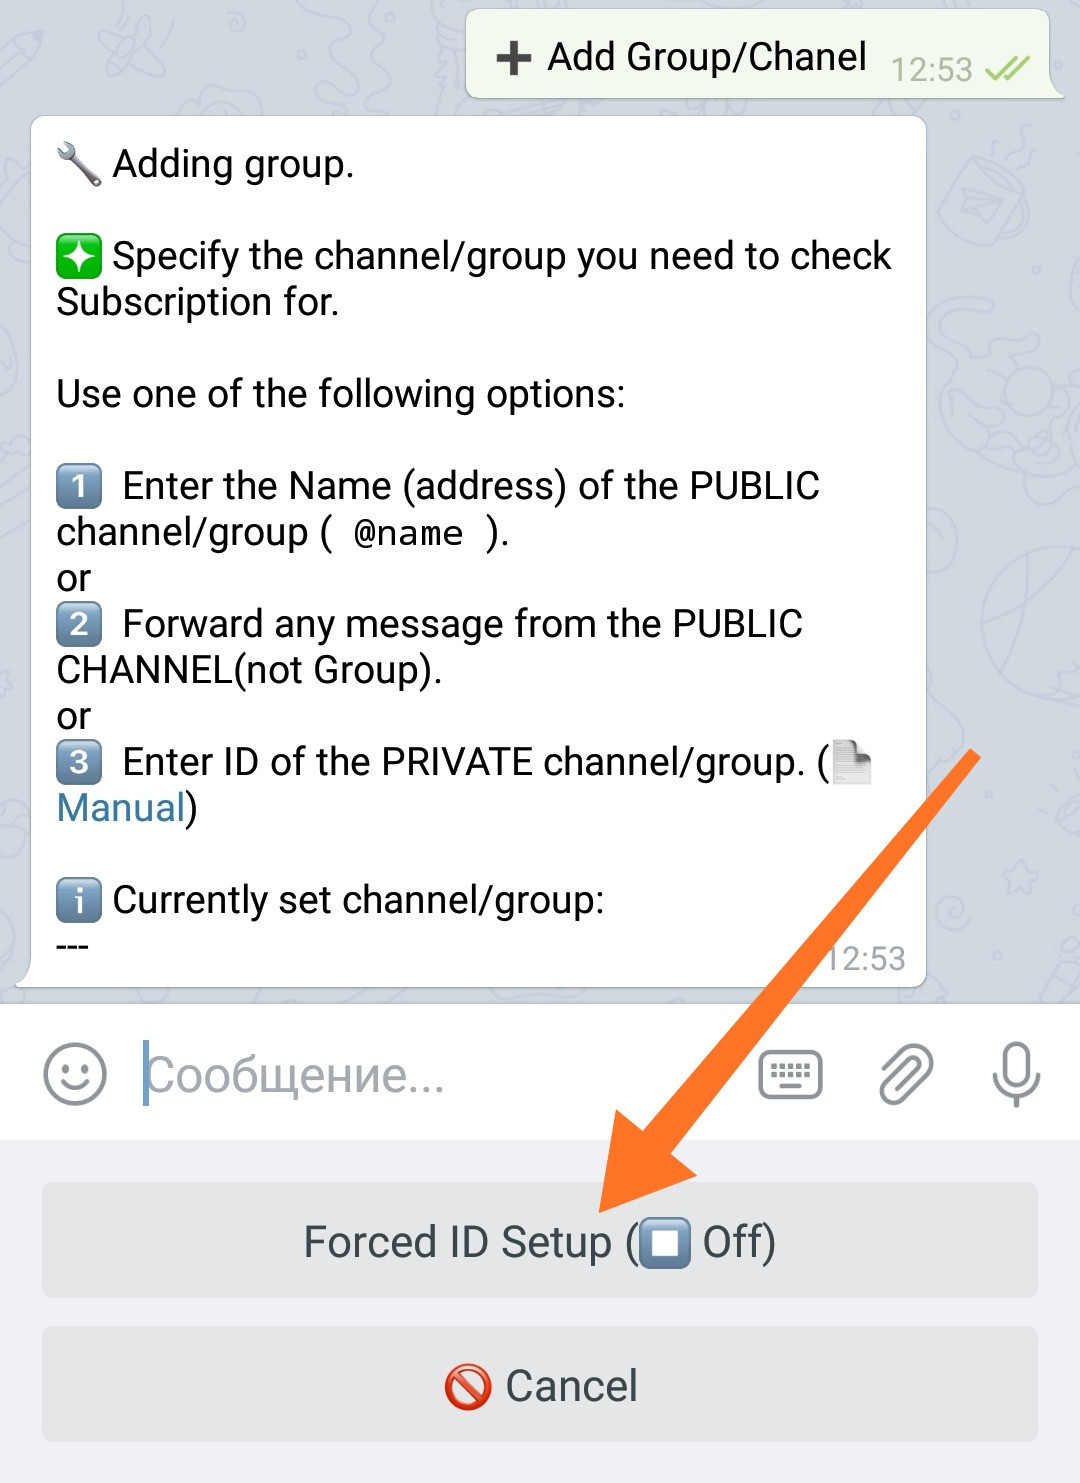
2.1 Press "+ Add Group/Channel"
2.2 Send the group's details (one of the following):
● the name of the PUBLIC channel/group (@name)
● forward the message from the PUBLIC channel
● ID of the PRIVATE group (see below how to get the ID)
When sending a public @name of a channel to a bot, the bot may return an error. A POSSIBLE reason is that Telegram does not immediately after adding gives your bot the right to see information on the channel or group. Try to wait a bit and try again. But it is better from the beginning to use the third option - "Add using group's or channel's ID".
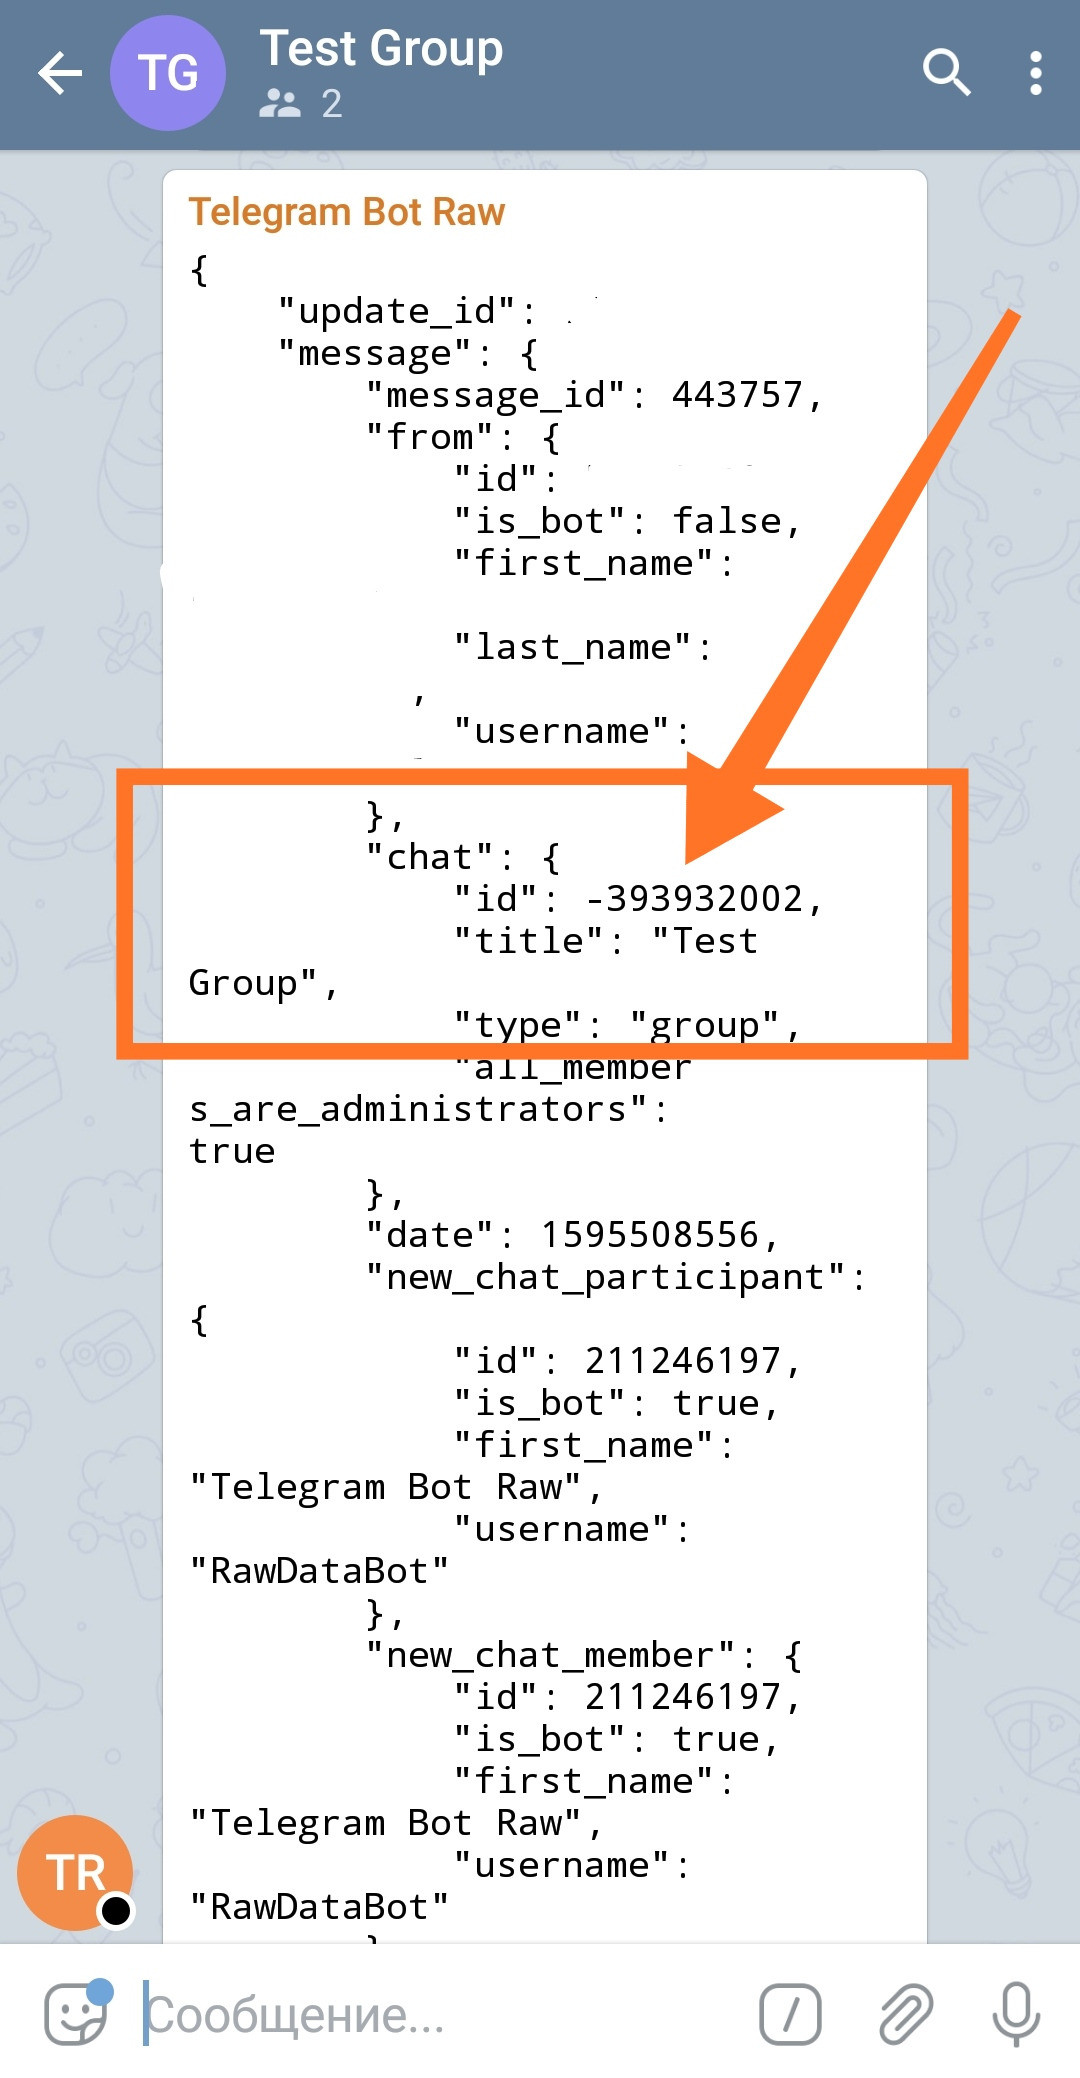
Use @RawDataBot to get the private group's ID. Add it to the group with full rights. Once it is added, it will send a message to the group with all the data:
You can also use @myidbot, after you add it to the group as an admin, send a following command to the group /getgroupid. The bot will also send you a group's ID.
Copy the ID from the "chat" section and use it to add the group to the bot.
The ID number starts with a "-" (minus) sign. Copy ID with this sign!
If bot stopped working in group after some time
IMPORTANT: The group ID MAY CHANGE when the group status changes from regular to Super-group. In this regard, the bot functions related to its activity in the group (subscription, triggers, moderation, etc.) will stop working. In this case, the group will need to be added again with a new ID. To do this, repeat the steps described above regarding how to add a bot to a group.
"Regular private group" changes its status to "Super-group", for example, if you enable the "Show all history to new users" setting. Regular Private Group and Super-group IDs will differ in length. The screenshots show examples of the ID of a Normal private group with a length of 9-10 characters. The Super-group's ID is 12-15 characters long and usually starts with -10 (in the future possible -20). If, after changing the group settings, your bot suddenly stops working, then most likely the group's ID has changed. In this case, you will need to change the binding ID by repeating the steps described above.
After that, remove @RawDataBot from the group.
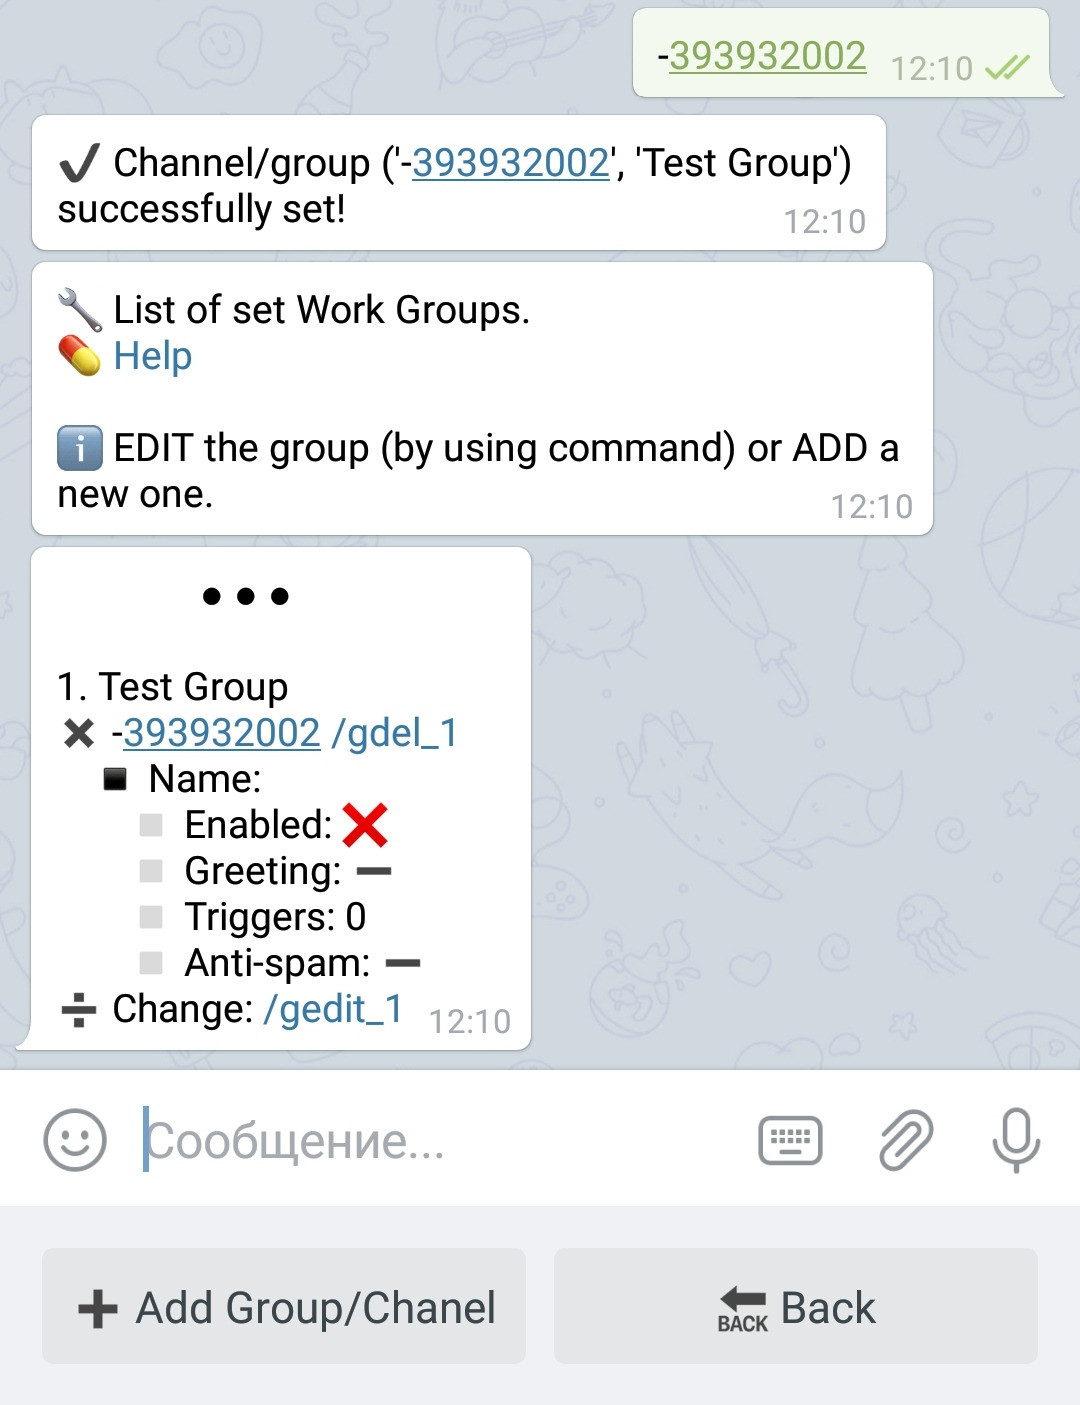
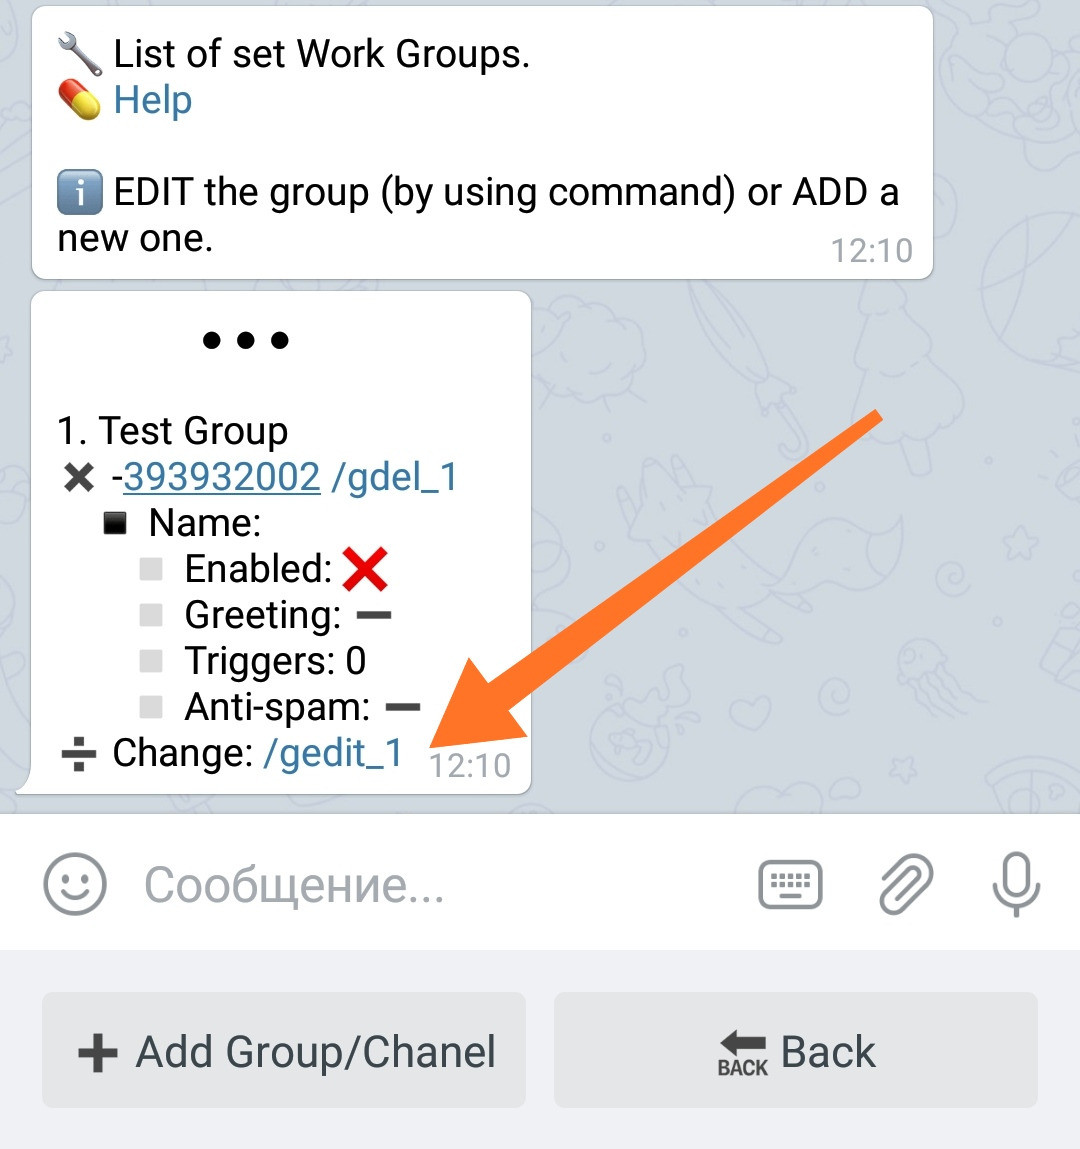
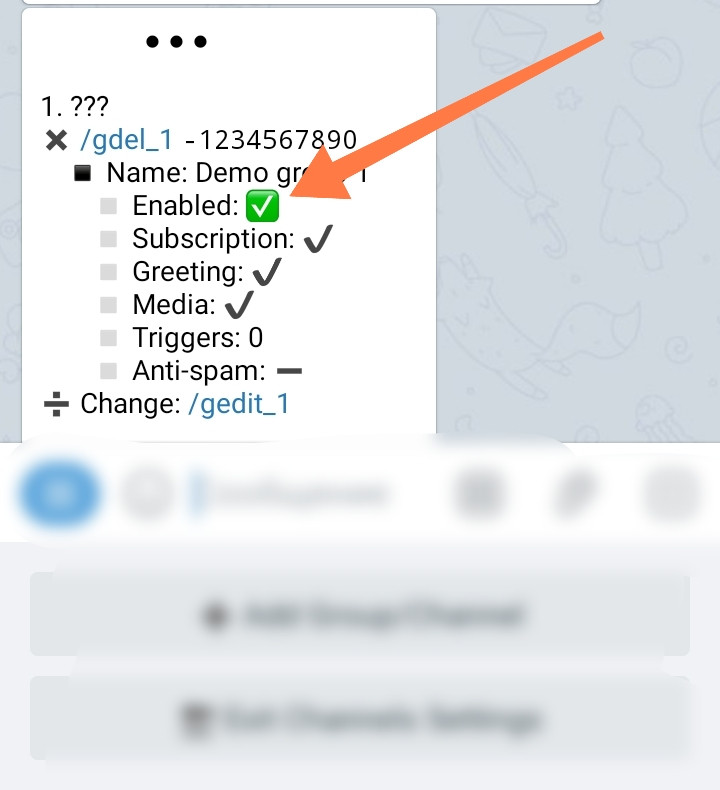
If everything goes well, you will see that added group in the list:
Forced addition of ID
Sometimes a bot cannot recognize a Private Group by its ID. However, if you are sure that the private group's ID you received is correct, you can forcibly add it using this ID. To do this, enable "Forced ID Setup" by clicking on the button below.
Please note that in this case the group will be added with any ID you send, even if it is not correct. Obviously, a group added with an incorrect ID will not work.
If a group that was added forcibly still does not work, we recommend that you temporarily make the group public, add it as public, and then change its status back to private again.
The group header can be empty if the bot does not already know this group. Later, the title will be updated automatically.
After that, you can add the bot to the group, and he will not leave it.
BotFather - Privacy and Group settings
If you planning to use your bot for something other than Subscription Check, bot's "Group Privacy" setting in @Botfather has to be DISABLED. Otherwise bot will not see your user's messages. At the same time "Allow Groups?" has to be ENABLED. if something malfunctioning just go and check those settings.
For this go: @BotFather
Send command /mybots
Choose necessary bot
Press "Bot Settings"
Set "Allow Groups?" - ENABLED
Set "Group Privacy" - DISABLED
❖ How to set up a group
To set up a group, find the group in the list and click the group's editing command:🔐Admin | 🧫Channels and Groups | My Groups
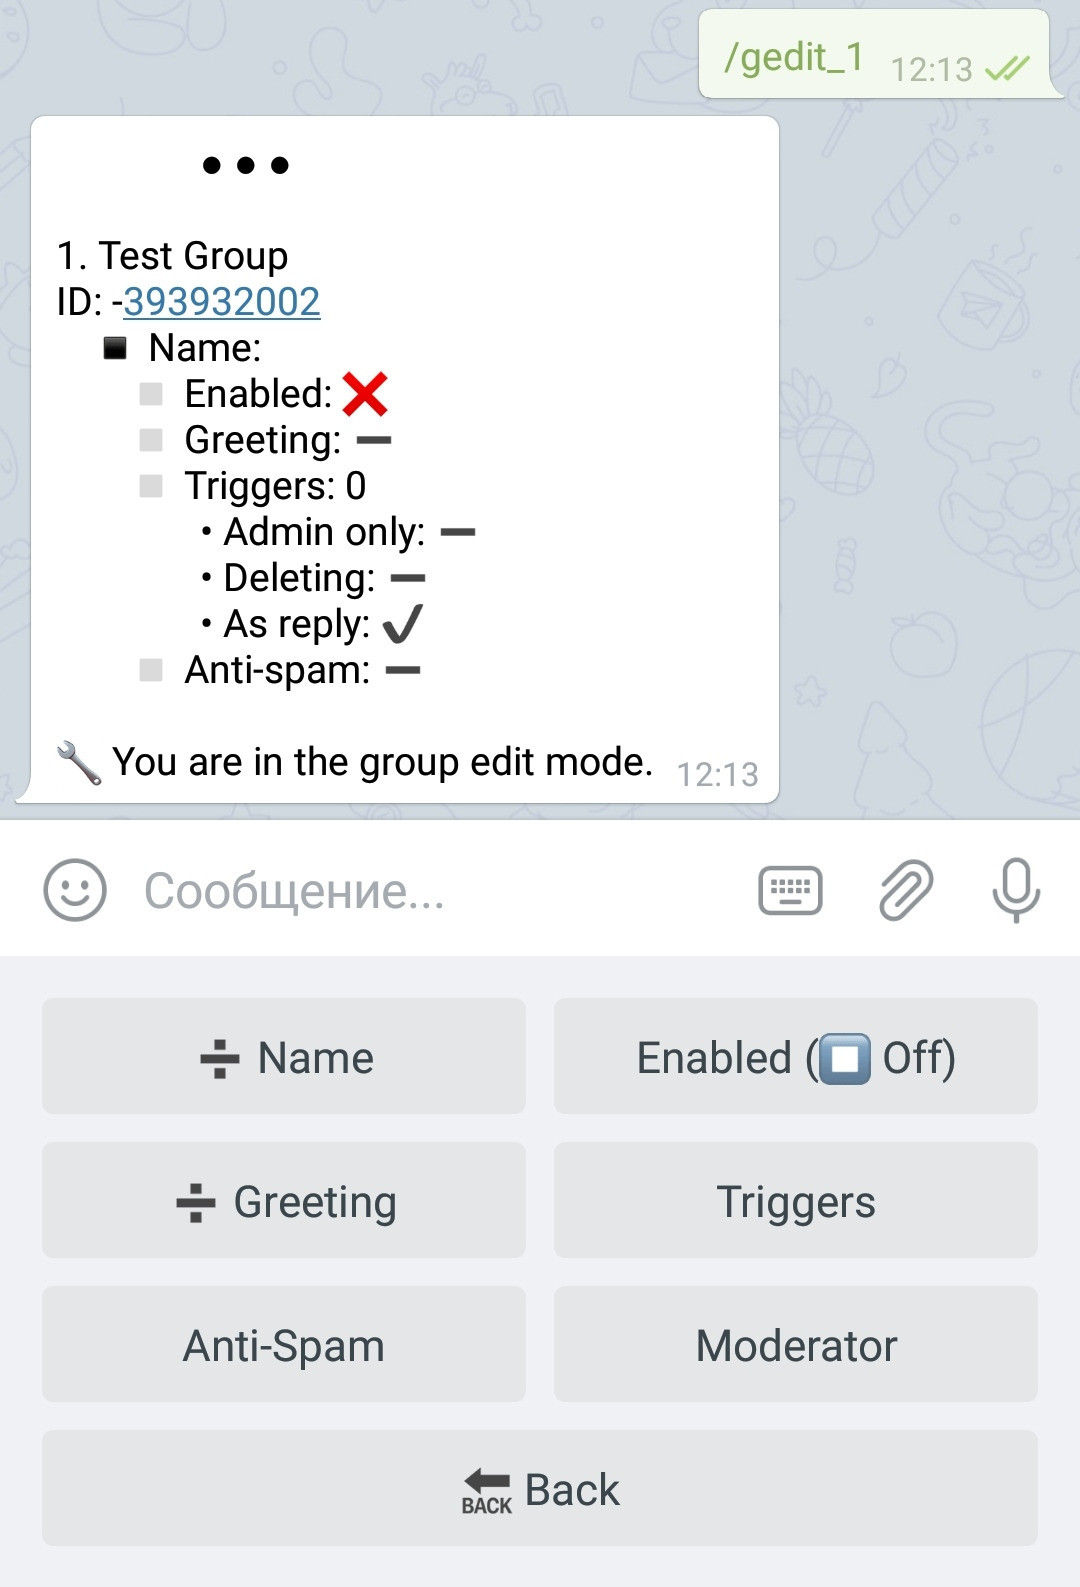
You will be taken to the group editing menu:
The current group settings are indicated in the message, the settings are made using the buttons in the lower menu. In the Group Settings, in addition to the group settings themselves, there are modules for group protection, moderation, as well as trigger's settings.
❖ Settings of the group itself
Basic settings for the work of the group itself.
Name
➗ Name - allows you to add your own group name or a comment to the group (optional). This information is exclusively for the administrator and will be visible only to him. It will be shown in the Admin menu when working with a group.
Included
Enables or disables the group.
Modes:Off ⏹️ - the group is disabled.On ▶️ - the group is included.
The current state is displayed on the button.
When the group is disabled, the bot will not work in the group and it will LEAVE it - all the group settings will be preserved (so that the group can be enabled without re-configuring). You can still customize the group settings and everything else.
Only one group can be disabled to avoid storing a large number of disconnected groups.
In order for the bot to remain in the group and be able to work in it, the group must be ENABLED in settings!
Turning on the group will immediately write off 1 "Token of Group" for the current day!
Greetings
Allows you to set a welcome message for new users of the group.
Modes:If message is set - welcome new users included. If message is deleted of no set - the greeting is disabled.
The greeting message can use Macros %firstname% for all bots.
Macros
%lastname%,%username%,%userid%,%firstnamelink%,%usernamelink%available for accounts who have connected functionality "user macros".Macros.
To connect, go in your bot:
☞🔐Admin | 🧩Extensions | 📂Macros
In the welcome message, you can now use inline buttons such as "URL" and "Popup window". If you create command buttons, they will not be shown.
In the editor of the welcome message, there are buttons «Invisible» and «Variable Media» - these options are not applicable to this message and are present here only because, for the sake of economy ))), the standard message editor was used, perhaps in the future they will be removed from there. In addition, it is no longer possible to cancel the creation of a message at the second step, if you change your mind about creating it, then complete the process and then clear the data when you re-enter the editor.
If you need a greeting message with media (with a picture), create it from scratch in the required form (since you cannot use a Media Variable in this message).
IMPORTANT: If your bot SUDDENLY stopped showing the "Welcome message". This can happen if you enable the "Hide Members" option of the group's settings in the "Members" section. It is clear that the specific names of the sections may vary depending on the version of the application, as well as on which Telegram client you are using, the main idea is that if you hide group members, the bot will stop welcoming them. Where exactly is the setting in your case, see for yourself.
❖ Other section settings
Forms
Here are the Forms settings that are described in the corresponding section.
Subscription check
Here are the Subscription Check settings which are described in the corresponding section.
❖ How to delete a group
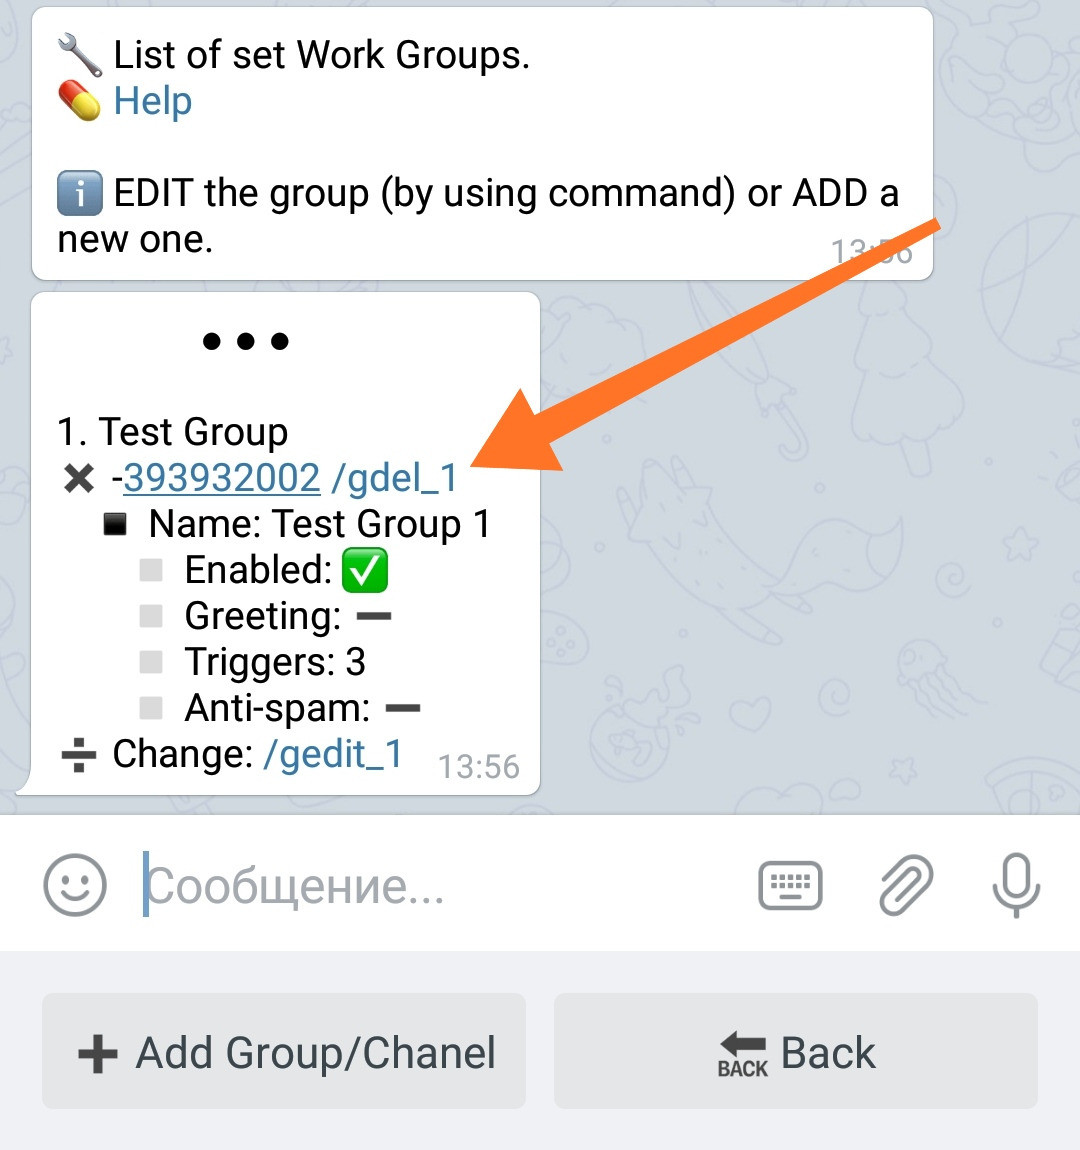
Go to "My Groups".🔐Admin | 🧫Channels and Groups | My Groups
To delete, find the group in the list of groups and click on the command /gdel_x to delete the group (where x is the sequence number of the group):

