
Advanced Mailing Mode
The number of Monthly and Additional Tokens of Messages are displayed in the information message in the chat:
Note that the message contains a link to this manual - for some reason this link is the most inconspicuous link on the whole internet.
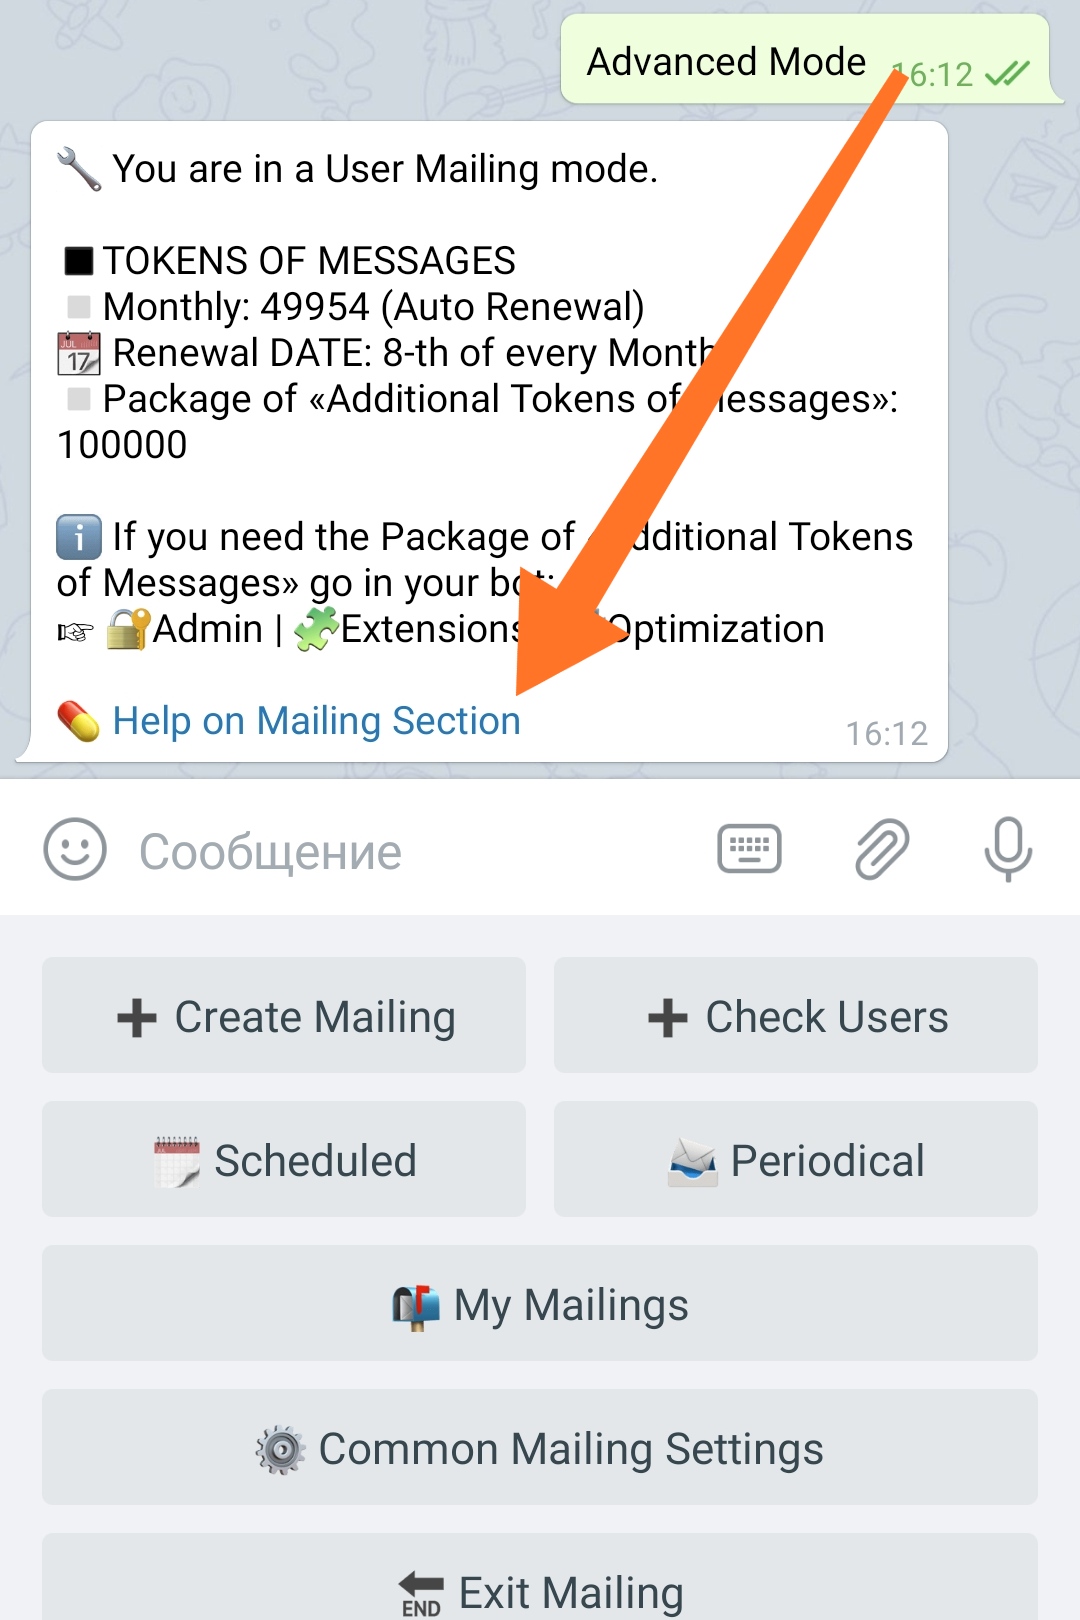
Below are the section's buttons, in the order of their appearance in the menu. If this is your first time using Advanced Mailing Mode, you should start with the «Common Mailing Settings» menu.
❖ Menu of Advanced mailing mode
Create mailing
Depending on the active extensions, a different number of mailing options will be available to you.
Send Now
The message you create here will be sent immediately after creation.
Send Scheduled
This option will allow you to set the Date and Time of mailing, if you want to create a one-time newsletter for the future.
This mailing option will not be available to you if the corresponding extension is not activated in your bot.
Scheduled and Periodical Mailings.
To connect, go in your bot:☞ 🔐Admin | 🧩Extensions | 📂Mailing
Send Periodically
Here you can save a message to be sent manually, at a specific time, by a command, or periodically, after a specified period of time. The message will NOT be deleted from the list after mailing and can be reused in future.
This mailing option will not be available to you if the corresponding extension is not activated in your bot.
Scheduled and Periodical Mailings.
To connect, go in your bot:☞ 🔐Admin | 🧩Extensions | 📂Mailing
Each mailing option has its own guide.
● Send Now
● Send Scheduled
● Send Periodically
Check users
The function is checking users for their presence in the bot. Allows you to update the current number of live users in the bot and mark those who deleted (blocked) the bot, WITHOUT sending them messages.
Consumes "Tokens of Messages" just like regular message during mailing.
The checking Speed can be adjusted in the same way as for the regular mailing.
Scheduled
This menu will gather (and present it as a list of messages) all your planned «Scheduled» mailings.
This section will become available if the corresponding extension is activated in your bot.
Scheduled and Periodical Mailings.
To connect, go in your bot:☞ 🔐Admin | 🧩Extensions | 📂Mailing
Read more about the «Scheduled» mailing mode in a separate manual.
Periodical
This section will become available if the corresponding extension is activated in your bot.
Scheduled and Periodical Mailings.
To connect, go in your bot:☞ 🔐Admin | 🧩Extensions | 📂Mailing
Read more about the «Periodical» mailing mode in a separate manual.
My Mailings
In this section, you can manage mailings: see stopped (for example, by Tempoban) mailings and continue them, as well as cancel current, started or not yet started (Scheduled or Periodical) mailings.
You will be shown a full list of current mailings in the form of messages - click the inline button «Edit» in the desired message - to change the settings it represents.
Sometimes (rarely) it happens that some of the launched mailing are not displayed in this section - if the reports on the progress of such mailing are still coming, then in fact everything is fine with this mailing.
Common mailing settings
Dead after...
The setting determines after how many UNSUCCESSFUL attempts to send a message in a row, the user is considered "dead" and attempts to send him messages will be stopped.
The setting status is displayed on the button itself and in the chat info message.
This setting is Global and changed for all Mailings same time.
You can specify the required number - from 1 to 5 attempts. If, for example, choose 3, then after three mailings, if no messages were delivered, attempts to send messages to this user will no longer be undertaken by your bot. This will allow you to save mailing messages without wasting them trying to send messages to "dead" users.
To change the number of attempts, press the button of this function. The button sequentially, in a circle, will change the number.
Speed
The function allows you to speed up the mailing of your bot by 2, 4, 6, 8 times.
Boosted Mailing requires additional "Tokens of Messages". The total number of tokens required will be shown in the info message of the chat.
For reference: the approximate delivery speed and the number of «Additional Tokens of Messages» consumed.
х1 ≈5K messages per hour will be send
x2 ≈10K per hour, 2 «Additional Tokens of Messages»
x4 ≈20K per hour, 3 «Additional Tokens of Messages»
x6 ≈30K per hour, 4 «Additional Tokens of Messages»
x8 ≈40K per hour, 5 «Additional Tokens of Messages»
When accelerating, tempobans from Telegram are possible , therefore, we do not guarantee that the accelerated Mailing will work equally well for everyone.
You need to set the Mailing Speed BEFORE you start your mailing. If you decide to increase the speed after you started it, then you should not expect any instant increase. In fact, the speed will be increased in the range from 1000 to 10000 of sent messages (since activation) - everything will depend on the number of people in the bot.
Set condition
Allows you to set the conditions that will be assigned by default to each new Mailing. For each individual distribution, it can be changed separately during creation.
The presence of this setting in the interface will depend on whether the extension is active:
Conditions for Mailing.
To connect, go to your bot:☞ 🔐Admin | 🧩Extensions | 📂Mailing
Allows you to use Conditions when sending out mailings in order to target your messages to specific groups of users in accordance with these Conditions.
Default mode
This setting allows you to choose which mode you want the admin to be transferred when entering a «Mailing» menu.
Modes:Simple Mode - is the mode where admin gets when he entering first time.Advanced Mode - all possible functions are available.
switched by pressing the button.
The setting status is displayed on the button itself.
When you first going in the Mailing, the «Simple Mode» will always be active - with the ability to switch to the «Advanced».